The Best Way to Seal Roof Leaks Starts With Finding the Source
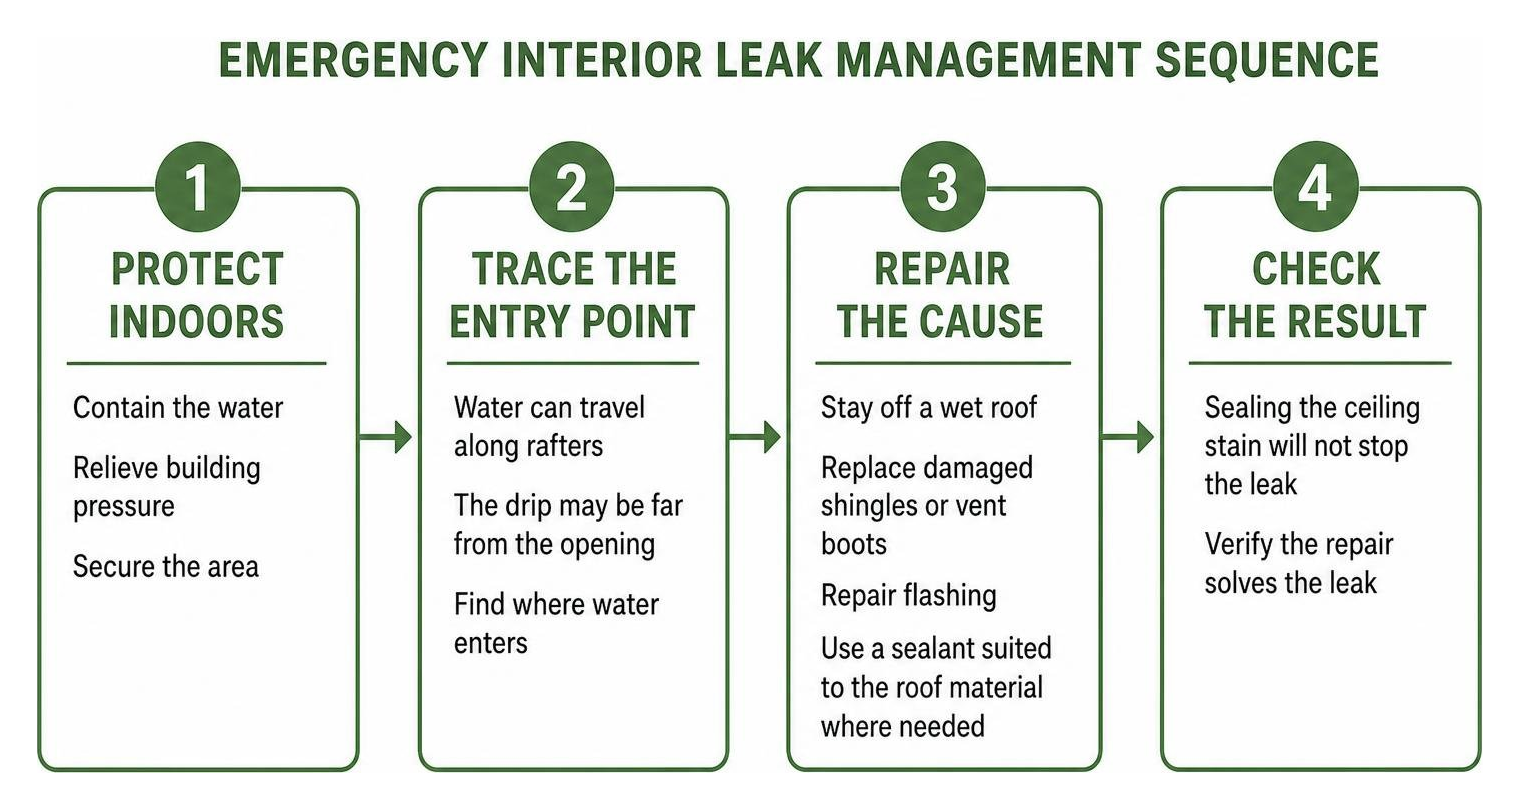
The best way to seal roof leaks is to find where water enters and repair the failed roofing part. Protect the room below and stay off a wet roof. A roofer can trace the leak, replace damaged shingles or vent boots, repair flashing, and use a sealant suited to the roof material where needed. Sealing the ceiling stain will not stop the leak.
Water can travel along rafters before it appears indoors, so the drip may be far from the opening. In Northern Illinois, finding that opening matters as much as choosing the right sealant.
I’m Thomas Pruszynski, owner of TJ Builders & Developers Inc. After more than 20 years helping homeowners protect and improve their properties, I know the best way to seal roof leaks starts with a careful diagnosis and a repair built to last.
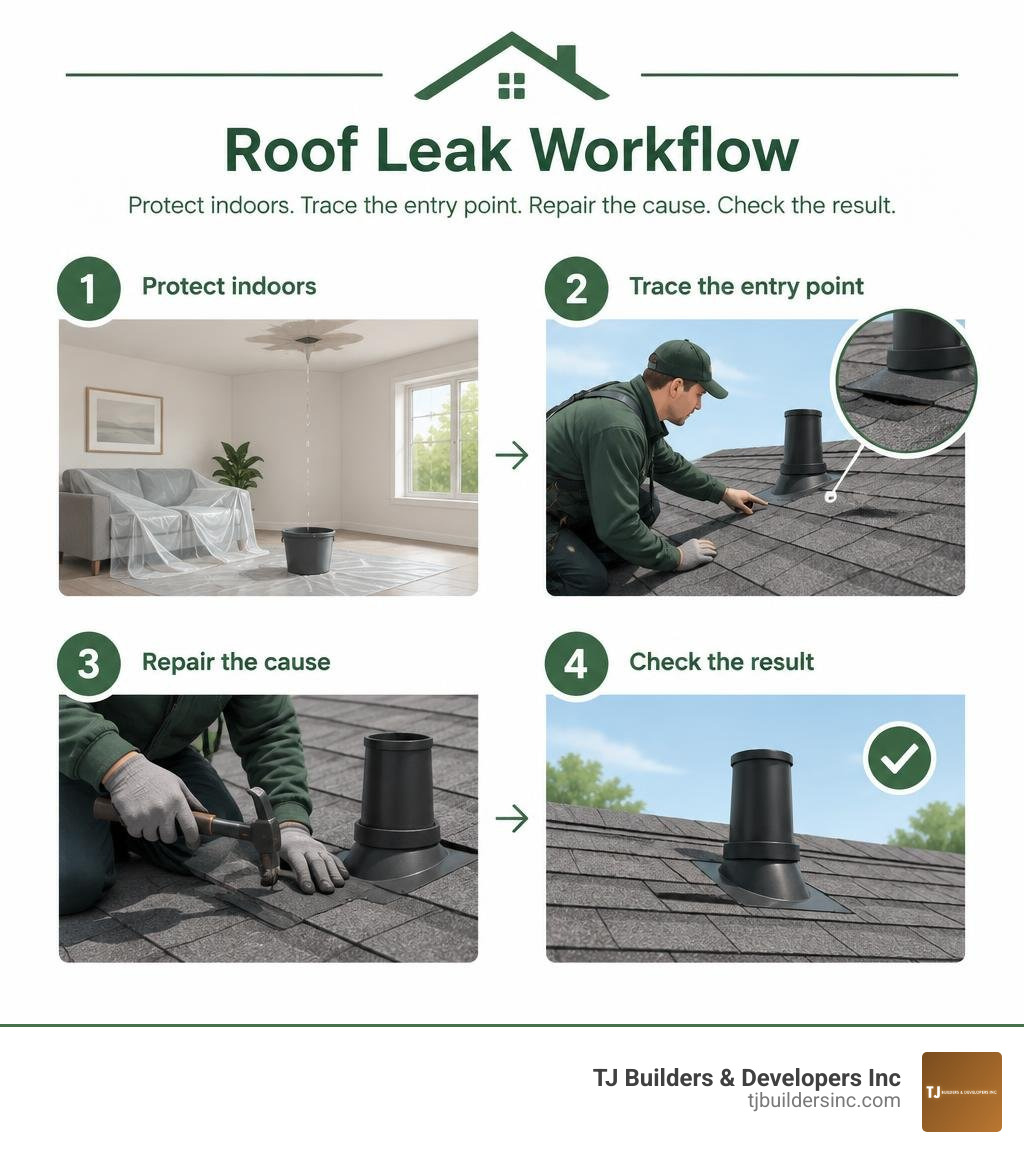
Simple guide to best way to seal roof leaks:
Identifying Roof Leak Sources and Immediate Emergency Mitigation
When water begins dripping into your living space, time is of the essence. Water intrusion compromises structural framing, degrades insulation, and can initiate mold growth within drywall in just 48 to 72 hours. However, rushing outside with a ladder during an active storm poses severe safety risks.
Effective mitigation begins indoors by containing the water, relieving building pressure, and securing the area before arranging emergency roof repairs to manage storm damage.
Tracing Hidden Water Paths from Attic to Decking
Water rarely travels in a straight vertical line. It typically enters through a breach in the exterior roof covering, trickles down the sloped underlayment or roof sheathing, follows the edge of a rafter, and eventually pools over a low spot in the drywall ceiling.
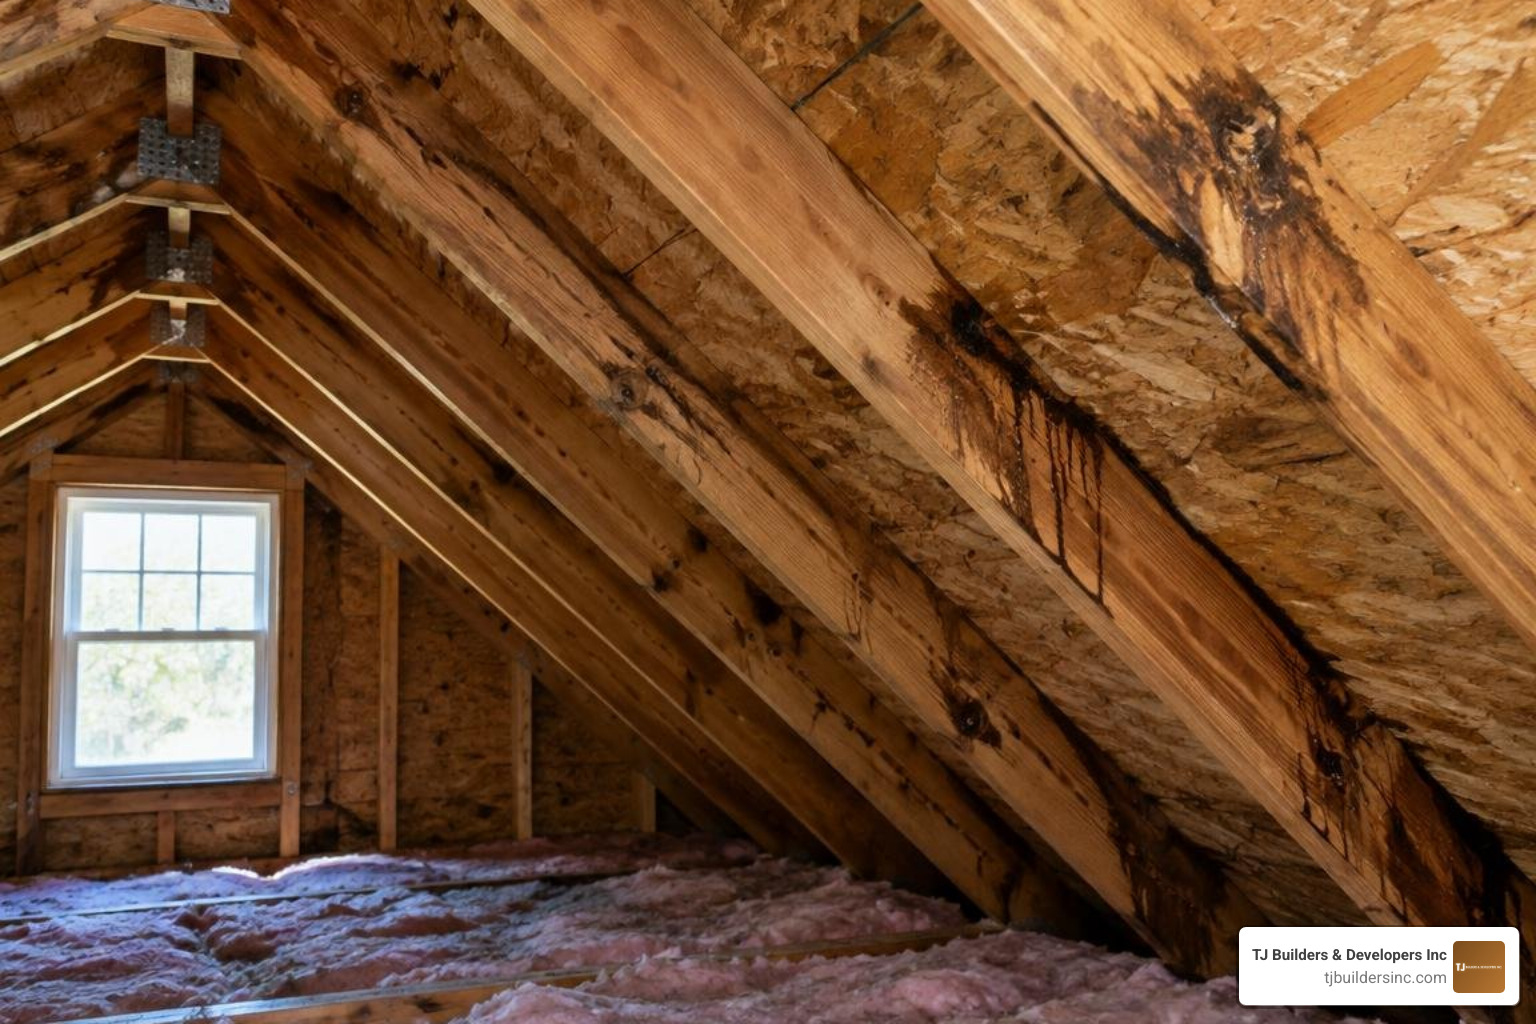
To identify the true source, professional contractors rely on expert roof leak inspection and diagnostic techniques. During an attic inspection, we look for:
- Moisture tracking along framing: Dark water stains, damp insulation, or mold trails traveling along rafter edges.
- Protruding roofing nails: “Frosting” or rust rings around shanks, indicating water bypassing shingles or heavy condensation accumulation.
- Daylight gaps: Points around chimneys, valleys, or plumbing stacks where external light penetrates the decking.
When visible damage is absent, a controlled diagnostic test—systematically applying water from a garden hose to individual roof zones while a technician monitors the attic—isolates the exact breach.
Emergency Water Containment and Temporary Interior Measures
Before addressing exterior components, homeowners must protect interior finishes and structural ceilings:
- Relieve pooling water: If a ceiling drywall section is sagging or bubbling, place a bucket beneath it and puncture the center with a screwdriver or utility knife. Releasing trapped water in a controlled stream prevents large-scale drywall collapse.
- Protect electrical circuits: Immediately turn off electrical breakers for lighting fixtures or wall receptacles located near the leak path.
- Capture runoff in the attic: Place a shallow catch basin or bucket over rafters (never directly on drywall) to capture water before it reaches the ceiling.
For comprehensive guidance on preserving thermal efficiency and structural framing during water events, review the Consumer Guide to Durable Attics.
Need Help With Your Home?
TJ Builders & Developers handles roofing, siding, gutters, windows, home additions, and fire damage restoration for homes and businesses in Lakewood, Crystal Lake, Schaumburg, and nearby McHenry County towns.
- Free, no-obligation estimates
- Licensed & insured
- 20+ years of local experience
Choosing the Best Way to Seal Roof Leaks by Material and Penetration Type
The longevity of any roof repair depends on selecting a sealing compound chemically compatible with the underlying substrate. Roofs undergo constant thermal expansion and contraction alongside severe ultraviolet (UV) exposure. Using generic hardware caulk on specialized roofing materials often causes early joint failure.
Homeowners evaluating products can learn more about selecting proven roof seal repair products to ensure lasting protection.
| Sealant Category | Primary Chemical Base | Expected Lifespan | Ideal Roofing Substrates | Key Limitations |
|---|---|---|---|---|
| Polyurethane Sealants | Moisture-cure polyurethane | 15–20 Years | Asphalt shingles, metal flashing, masonry, wood | Requires dry surfaces; slower full cure |
| 100% Silicone Sealants | Polysiloxane polymer | 10–20 Years | Metal roofing, EPDM, glass, skylight curbs | Non-paintable; nothing adheres to cured silicone |
| Elastomeric Roof Cements | Rubber-modified acrylic/bitumen | 5–10 Years | Built-up roofs, modified bitumen, asphalt flashings | Must be coated to prevent UV embrittlement |
| Butyl Rubber Tape | Synthetic polyisobutylene | 10–15 Years | Metal seams, lap joints, fastener flanges | Low tensile strength; purely a gasket seal |
Evaluating Sealant Types: Polyurethane, Silicone, and Rubberized Coatings
Commercial and residential roofing systems rely on specific chemical formulations to maintain weather resistance:
- Polyurethane Sealant: Brands such as Geocel 2300 ProFlex or NPC Solar Seal deliver an estimated 15 to 20 year service life. These compounds remain permanently flexible through extreme temperature shifts and adhere strongly to metal flashing and asphalt shingles.
- Silicone Formulations: Ideal for metal transitions and skylight glass framing. While moisture-tolerant, standard silicone should never be applied over surfaces requiring future resealing because uncured adhesives will not bond to existing silicone residues.
- Rubberized Coatings: Brush- or spray-applied liquid rubber waterproofing systems form seamless elastomeric membranes across roof seams and low-slope decks.
- Asphalt Plastic Cement: Traditional asphalt “roof patch” works for temporary emergency repairs, but standard big-box asphalt cement frequently hardens and cracks within three years under intense UV radiation.
The Best Way to Seal Roof Leaks Around Vent Boots and Flashing
Flashing failure is the single most common cause of residential roof leaks. Penetrations like plumbing vent stacks and chimneys interrupt the roof’s natural shedding plane, requiring robust mechanical flashing layered beneath upper shingles.
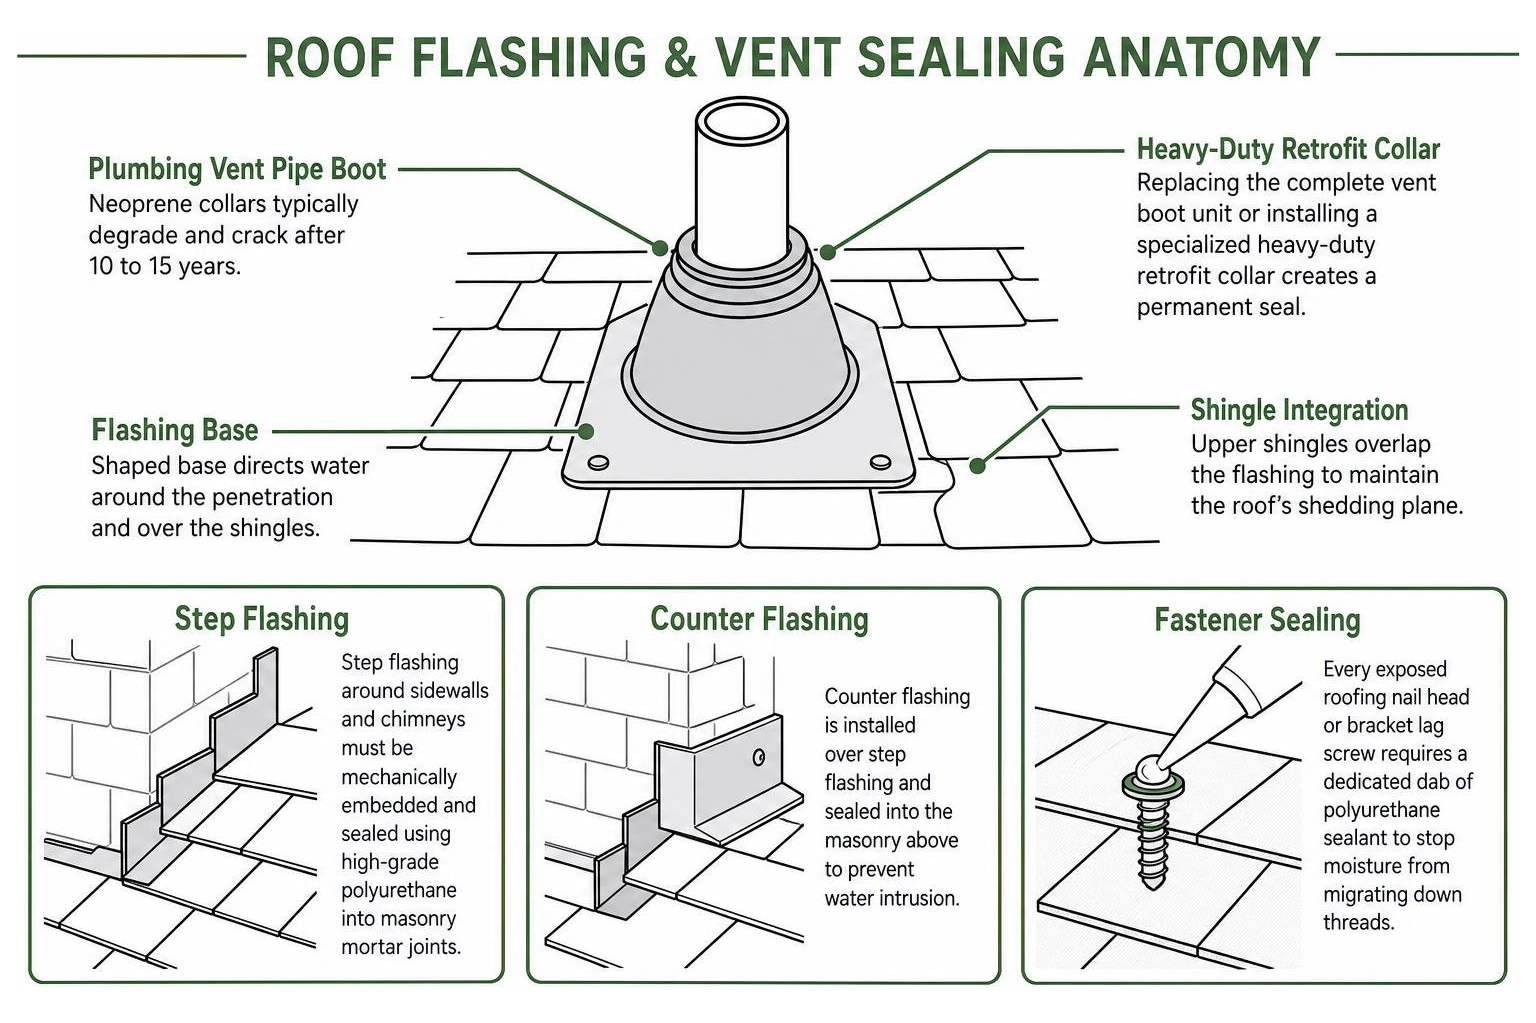
- Plumbing Vent Pipe Boots: Neoprene collars typically degrade and crack after 10 to 15 years of solar exposure. Replacing the complete vent boot unit or installing a specialized heavy-duty retrofit collar creates a permanent seal, far outperforming caulking over split rubber.
- Step and Counter Flashing: Step flashing around sidewalls and chimneys must be mechanically embedded and sealed using high-grade polyurethane into masonry mortar joints.
- Fastener Sealing: Every exposed roofing nail head or bracket lag screw requires a dedicated dab of polyurethane sealant to stop moisture from migrating down threads.
Proper installation ensures homes maintain durable water barriers by restoring roof waterproofing barriers.
Determining the Best Way to Seal Roof Leaks on Flat and Low-Slope Roofs
Low-slope and flat roof structures—common over porches, additions, and commercial properties throughout Crystal Lake and Schaumburg—demand specialized materials because water does not shed instantly.
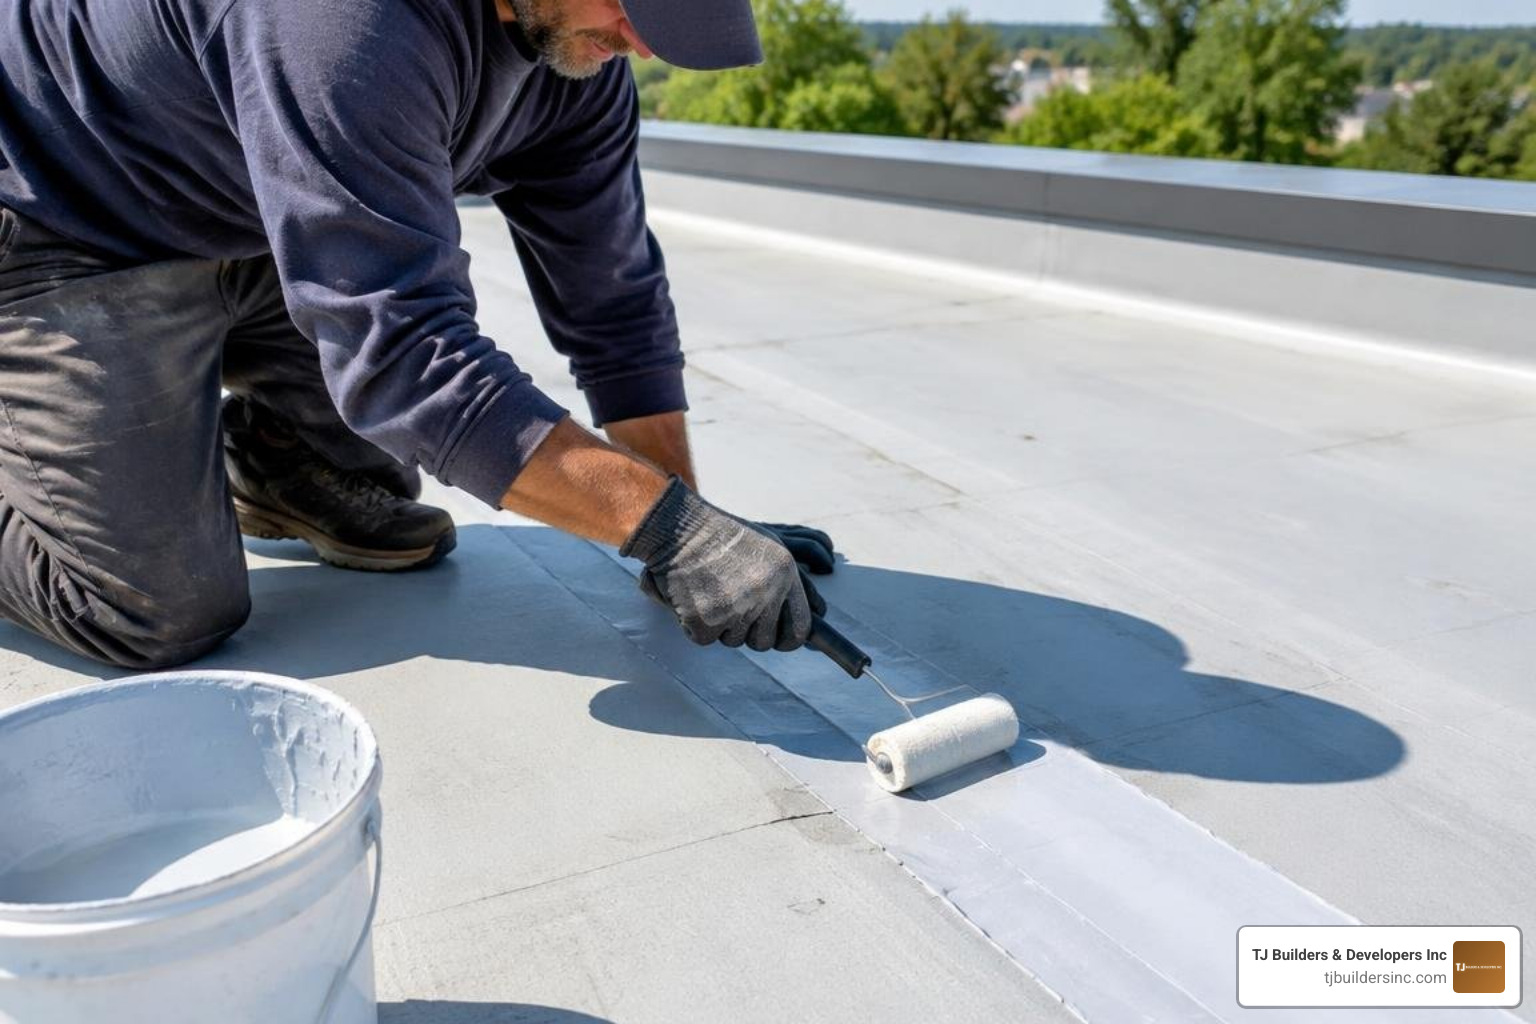
Ponding water standing for longer than 48 hours breaks down unrated adhesives. Repairs on EPDM rubber, TPO single-ply, or modified bitumen membranes require material-specific primers, peel-and-stick membrane patches, and compatible lap sealants along exposed seam edges. Detailed assessments can be found within these professional roof repair considerations.
Professional Permanent Repair Methods and Sealant Mistakes to Avoid
A durable roof repair integrates mechanical fasteners, proper underlayment overlap, and weatherproofing compounds. Relying entirely on surface-applied goop without correcting underlying structural or flashing defects only masks deterioration.
When managing unique cladding, such as addressing metal roof punctures and seam gaps, careful mechanical fastening is vital.
Professional Surface Preparation and Permanent Sealing Techniques
Contractors follow precise protocols to ensure repair materials fully integrate with the roof assembly:
- Substrate Cleaning: Removing all dirt, moss, loose granules, and failed old sealant down to bare metal or clean membrane.
- Backer Rod Installation: Inserting closed-cell foam backer rods into gaps wider than 1/4 inch before applying sealant, preventing joint failure from excessive compound depth.
- Layered Integration: Shingle repairs require lifting surrounding tabs, replacing broken fasteners, sliding new underlayment underneath, and nailing down replacement shingles before bedding the tabs in adhesive.
Explore comprehensive residential roof repair methods to see how full roofing assemblies protect living areas.
Critical Sealant Mistakes and Products That Accelerate Damage
In an emergency, homeowners often reach for materials that worsen roof damage over time:
- Expanding Spray Foam: Open- or closed-cell polyurethane insulation foam traps moisture against wooden decking and rafters, creating an incubator for hidden rot.
- Duct Tape or Masking Tape: Synthetic fabric adhesives disintegrate in hours under UV exposure and leave gummy residues that prevent proper sealant bonding.
- Silicone Applied Over Asphalt: Silicone will not form a stable bond with petroleum-based asphalt shingles or roofing cement, peeling away during the next freeze-thaw cycle.
- Layering Thick Roofing Tar Over Dirty Flashing: Traps water beneath the patch, rotting underlying structural sheathing unseen.
Essential Safety Standards, Professional Intervention, and Insurance Protocol
Working at heights introduces serious fall hazards. Structural water intrusion can also soften roof sheathing, creating hidden soft spots beneath shingles. Evaluating risks and evaluating roof damage and property impact protects both personal safety and financial investment.
Fall Protection and Ladder Safety
Professional roofers adhere strictly to OSHA safety regulations, utilizing fall arrest harnesses, anchored lifelines, and non-slip roofing boots.
Homeowners inspecting from ladders should observe standard ladder protocols:
- Place the base on firm, level ground using a 4-to-1 ratio (1 foot out for every 4 feet of eave height).
- Extend ladder rails a minimum of 3 feet above the roof line.
- Maintain three points of contact at all times.
- Avoid climbing onto roofs with steep pitches, wet surfaces, or frost.
When to Transition from DIY Sealing to Professional Roof Repair
Small, isolated repairs on low-pitch roofs (such as securing a single lifted shingle tab or replacing an accessible plumbing vent collar) can be straightforward. However, complex architectural features demand licensed professionals:
- Roof Valleys: A 1,000-square-foot roof can channel 200 to 300 gallons of runoff through a single valley during a heavy storm. Professional valley repair requires rebuilding metal liners and underlayments.
- Extensive Decking Rot or Sagging: Soft framing indicates deep water damage requiring structural lumber replacement.
- Multi-Piece Chimney Flashing Systems: Interlocking step, counter, and apron flashings embedded into masonry mortar require specialized metal fabrication.
Documenting Storm Damage and Mitigation for Insurance Claims
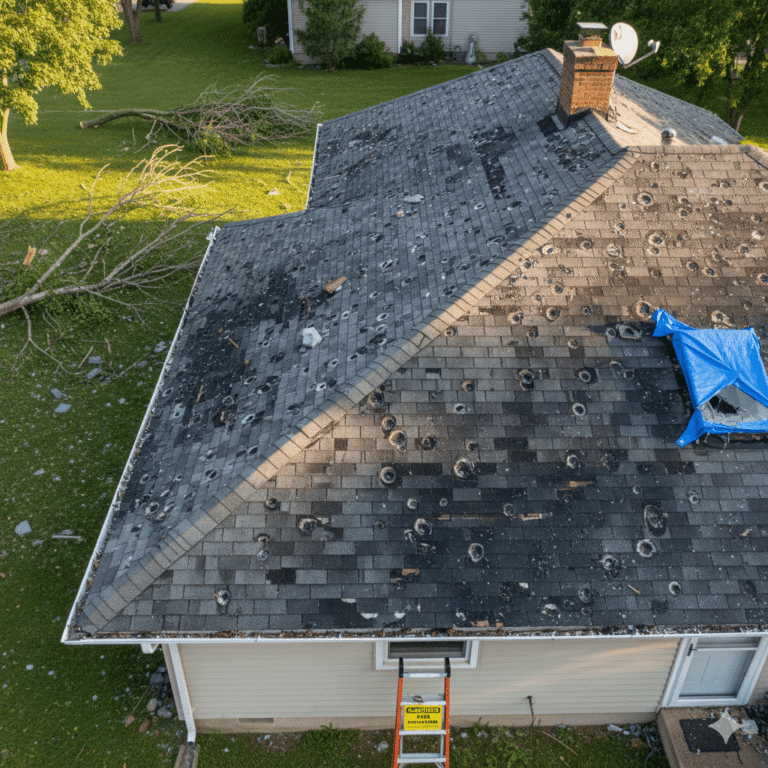
When roof leaks stem from sudden wind events, fallen tree branches, or severe hail, homeowners insurance may cover repairs. To protect your claim:
- Capture Dated Photographs: Take clear photos of interior water damage, active drips, and exterior roof conditions immediately.
- Retain Damaged Components: Save dislodged shingles or damaged vent caps as evidence for insurance adjusters.
- Keep All Mitigation Receipts: Maintain invoices for tarps, emergency services, and water containment supplies; insurers generally reimburse reasonable mitigation costs.
Need Help With Your Home?
TJ Builders & Developers handles roofing, siding, gutters, windows, home additions, and fire damage restoration for homes and businesses in Lakewood, Crystal Lake, Schaumburg, and nearby McHenry County towns.
- Free, no-obligation estimates
- Licensed & insured
- 20+ years of local experience
Preventive Roof Maintenance and Ice Dam Mitigation
Preventing water intrusion is consistently more manageable than dealing with ceiling repairs after a major storm. In Northern Illinois communities like Lakewood, Algonquin, and Woodstock, seasonal temperature extremes place heavy demands on exterior materials.
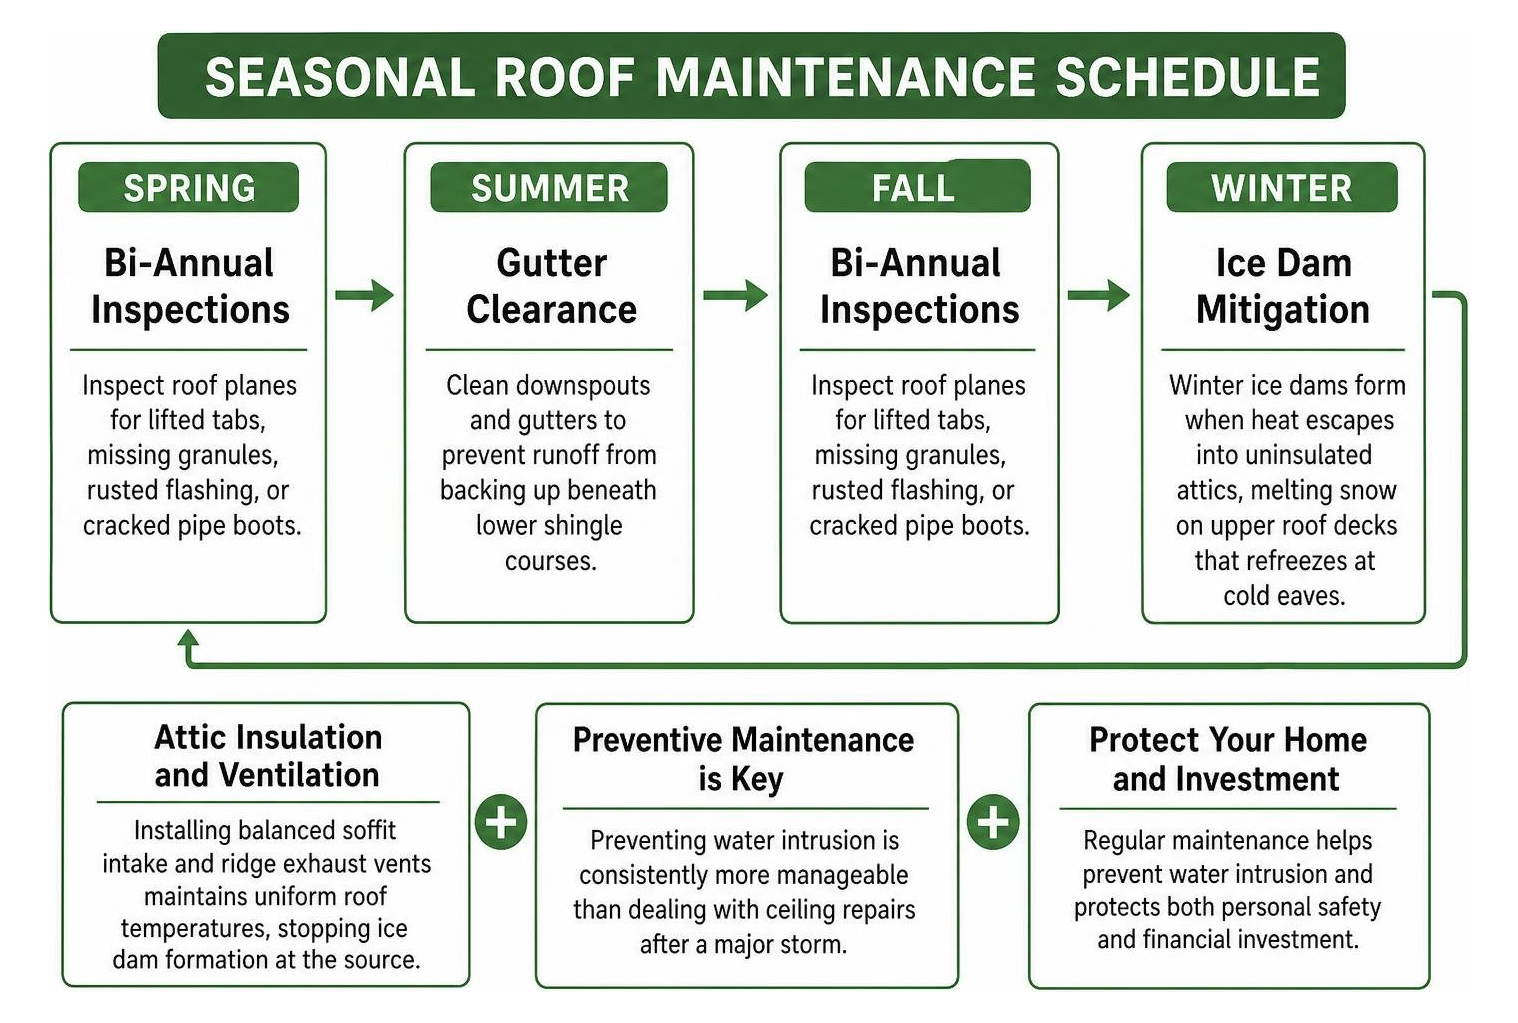
- Bi-Annual Inspections: Inspect roof planes each spring and autumn for lifted tabs, missing granules, rusted flashing, or cracked pipe boots.
- Gutter Clearance: Clean downspouts and gutters each season to prevent runoff from backing up beneath lower shingle courses.
- Attic Insulation and Ventilation: Winter ice dams form when heat escapes into uninsulated attics, melting snow on upper roof decks that refreezes at cold eaves. Installing balanced soffit intake and ridge exhaust vents maintains uniform roof temperatures, stopping ice dam formation at the source.
Frequently Asked Questions About Sealing Roof Leaks
Can you apply roof sealant directly during an active rainstorm?
Emergency wet-patch compounds formulated with specialized polymer solvents can displace standing water to slow active leaks temporarily. However, these are strictly short-term measures. Permanent polyurethane, silicone, and elastomeric repairs require clean, completely dry substrates above 40°F to cure and bond reliably.
How long does a professional polyurethane roof sealant last?
High-grade polyurethane sealants typically provide a 15 to 20 year service life when applied to properly prepared, clean surfaces. Their elasticity accommodates ongoing thermal expansion and contraction without tearing or pulling away from metal flashing.
Why is roofing tar not recommended for permanent flashing repairs?
Traditional asphalt roofing tar oxidizes rapidly under direct sunlight. As petroleum oils evaporate, the material becomes brittle, shrinks, and cracks within 2 to 4 years. Flashing transitions require elastomeric polyurethanes that flex with temperature swings rather than drying out.
Conclusion
Protecting your home from exterior water intrusion requires a careful diagnostic approach, material-specific sealants, and sound flashing techniques. From plumbing vent boot collars to complex roof valleys, finding and repairing the exact point of entry preserves your home’s framing and interior finishes.
For homeowners across Lakewood, Crystal Lake, Huntley, Schaumburg, and surrounding Northern Illinois communities seeking reliable, long-term exterior protection, TJ Builders & Developers Inc provides comprehensive roofing, siding, and restoration services. When you need lasting results, schedule a professional roof repair and inspection consultation with our experienced team.