Metal Roof Ridge Cap Installation: What Matters Most
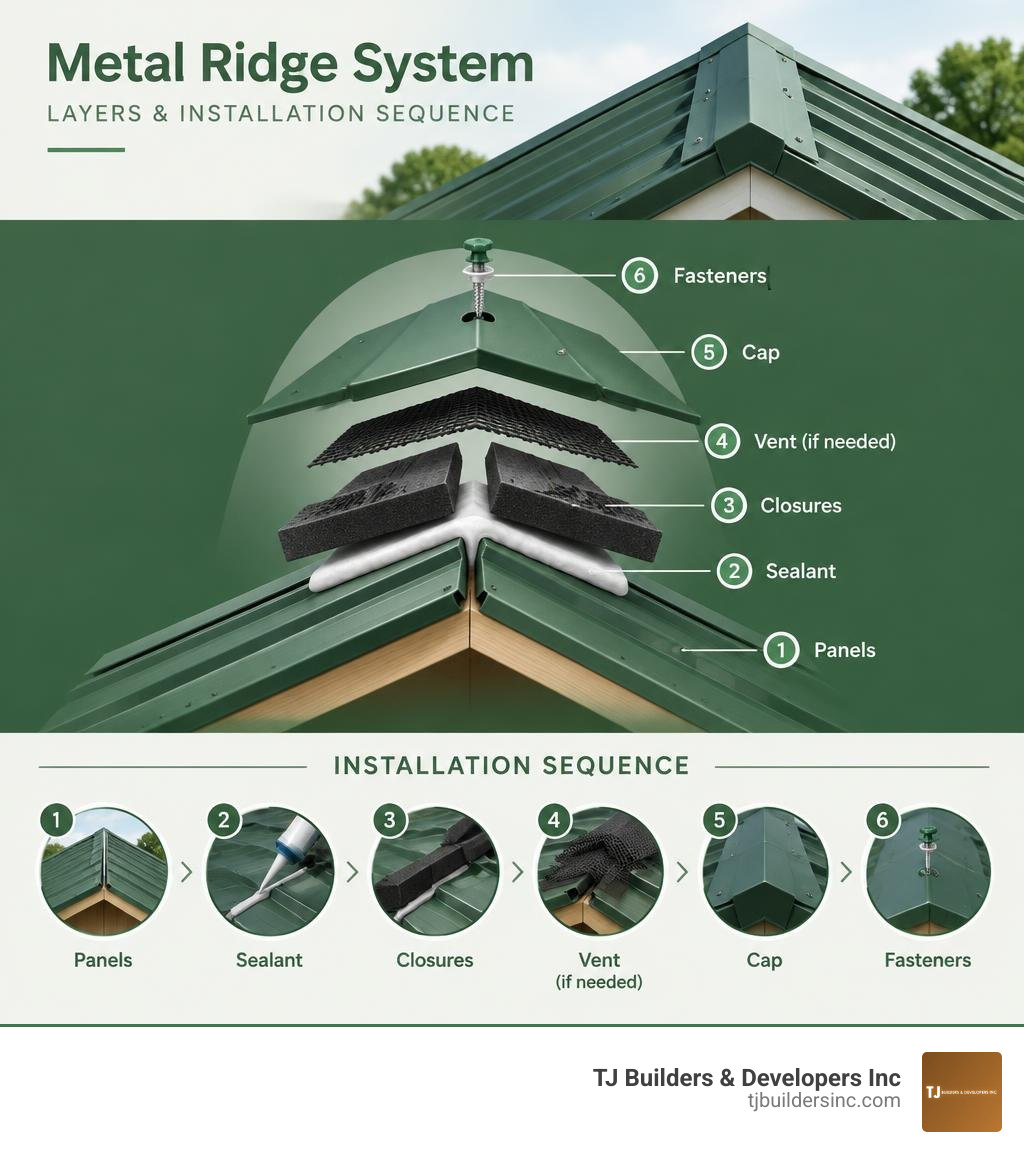
Metal roof ridge cap installation follows a clear order: match the cap to the roof panels, seal the gaps beneath it with the correct closures, center the cap over the peak, then fasten and overlap each piece according to the roofing system’s instructions. A vented ridge also needs a prepared opening and a vent material that lets attic air escape while helping keep out rain and pests.
The details matter most at the gable ends, overlaps, and fasteners. Poorly sealed gaps or misplaced screws can turn the roof’s highest point into a leak.
I’m Thomas Pruszynski, owner of TJ Builders & Developers Inc. After more than 20 years leading exterior home projects in Northern Illinois, I know why careful sealing and fastening are central to metal roof ridge cap installation.
Metal roof ridge cap installation word roundup:
Understanding Metal Roof Ridge Caps: Profiles, Closures, and Function
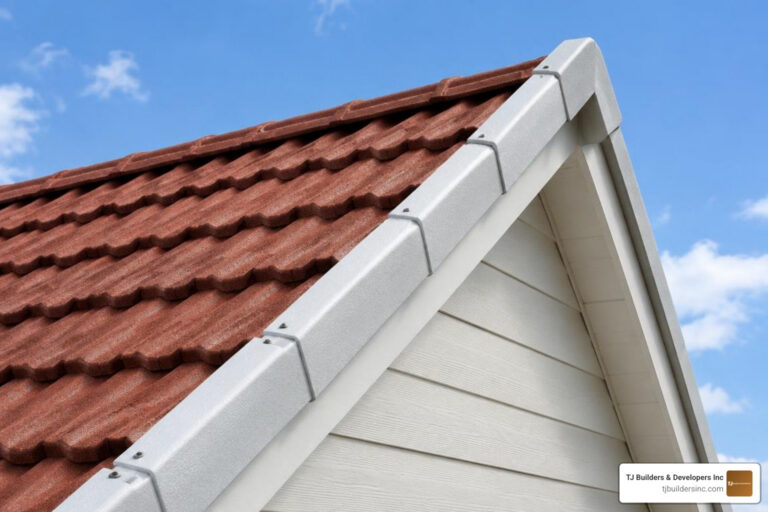
A metal roof ridge cap is the pre-formed metal trim installed along the peak where two opposing roof planes meet. Think of it as the roof’s protective crown: it bridges the open gap between metal panel runs, deflects driving precipitation, and prevents high winds from catching the top edges of the sheet metal.
Because steel panels feature raised ribs or standing seams, a flat piece of trim cannot sit flush against the roof deck without leaving open voids. A complete ridge cap assembly relies on precision-matched closure strips, sealants, and structural fasteners working together to seal those irregular voids.
| Feature / Component | Solid (Unvented) Ridge Cap Assembly | Vented Ridge Cap Assembly |
|---|---|---|
| Primary Function | Complete weather seal for conditioned unvented roofs | Continuous attic exhaust combined with weatherproofing |
| Roof Deck Detail | Solid decking completely covered by underlayment | 2-inch slot cut on each side of the ridge peak |
| Closure Components | Solid outside foam closures or solid metal Z-trim | Profile vent mesh rolls or perforated Z-closures |
| Intake Air Requirement | None | Balanced soffit or eave intake vents |
| Applicable Buildings | Sealed attics, spray-foam roofs, simple unconditioned sheds | Standard residential attics requiring IRC R806.2 ventilation |
| Material Life Expectancy | 40+ years (24-ga or 26-ga steel) | 40+ years (24-ga or 26-ga steel) |
The strength of modern residential metal roofing systems depends on selecting the proper metal gauge for regional conditions. For homes across Northern Illinois, 26-gauge steel serves as a reliable residential standard, while 24-gauge steel provides superior resistance against heavy snow loads (30 to 50 psf) and extreme wind uplift. Using a flimsy 29-gauge cap on a heavy-gauge roof invites buckling and early metal fatigue along the ridge.
Choosing Between Vented and Solid Ridge Assemblies
Deciding between a vented and an unvented ridge cap assembly comes down to the building’s thermal envelope and attic design.
In a standard residential attic, building codes such as IRC R806.2 mandate continuous passive ventilation—typically a 1:150 or 1:300 ratio of net free ventilating area relative to attic floor space. A vented ridge cap operates as the highest exhaust point in a natural convection system. Warm, moist air rises and escapes through the ridge, drawing cool, dry air inward through open soffit intake vents. This steady airflow prevents heat buildup during hot summer months and eliminates winter attic moisture that leads to structural mold and roof deck rot.
Solid ridge assemblies are reserved for specific structures: conditioned attic spaces insulated directly along the roof deck with closed-cell spray foam, or unconditioned outbuildings without ceiling insulation. When re-roofing in Northern Illinois, always verify local code compliance by reviewing municipal roofing replacement guidelines to ensure the balanced intake-to-exhaust ratio matches your roof structure.
Critical Role of Closure Strips and Z-Trim
Closure strips and metal Z-trim are never optional accessories—they are the core barrier keeping your home dry. Because corrugated and through-fastened panels feature high profile ribs, open triangular gaps remain beneath the ridge cap. Without closures, wind-driven rain, blowing snow, nesting birds, and insects enter the attic unchecked.
- Outside Foam Closures: Dense, UV-resistant expanded polyethylene foam blocks cut to mirror the exact profile of panels like Tuff-Rib or corrugated sheets. They are bedded between rows of butyl tape sealant directly over the panel ribs.
- Metal Z-Trim (Zee Closures): Formed steel bars shaped like a “Z” that are field-cut or pre-formed to fit between standing seam ribs. On standing seam assemblies, 20 linear feet of Z-trim are required for every 10 feet of ridge cap (10 feet on each roof slope).
- Profile Vents: Permeable, polyester-based mesh rolls that mimic panel contours, allowing moisture and air to vent freely while arresting driving rain and pests.
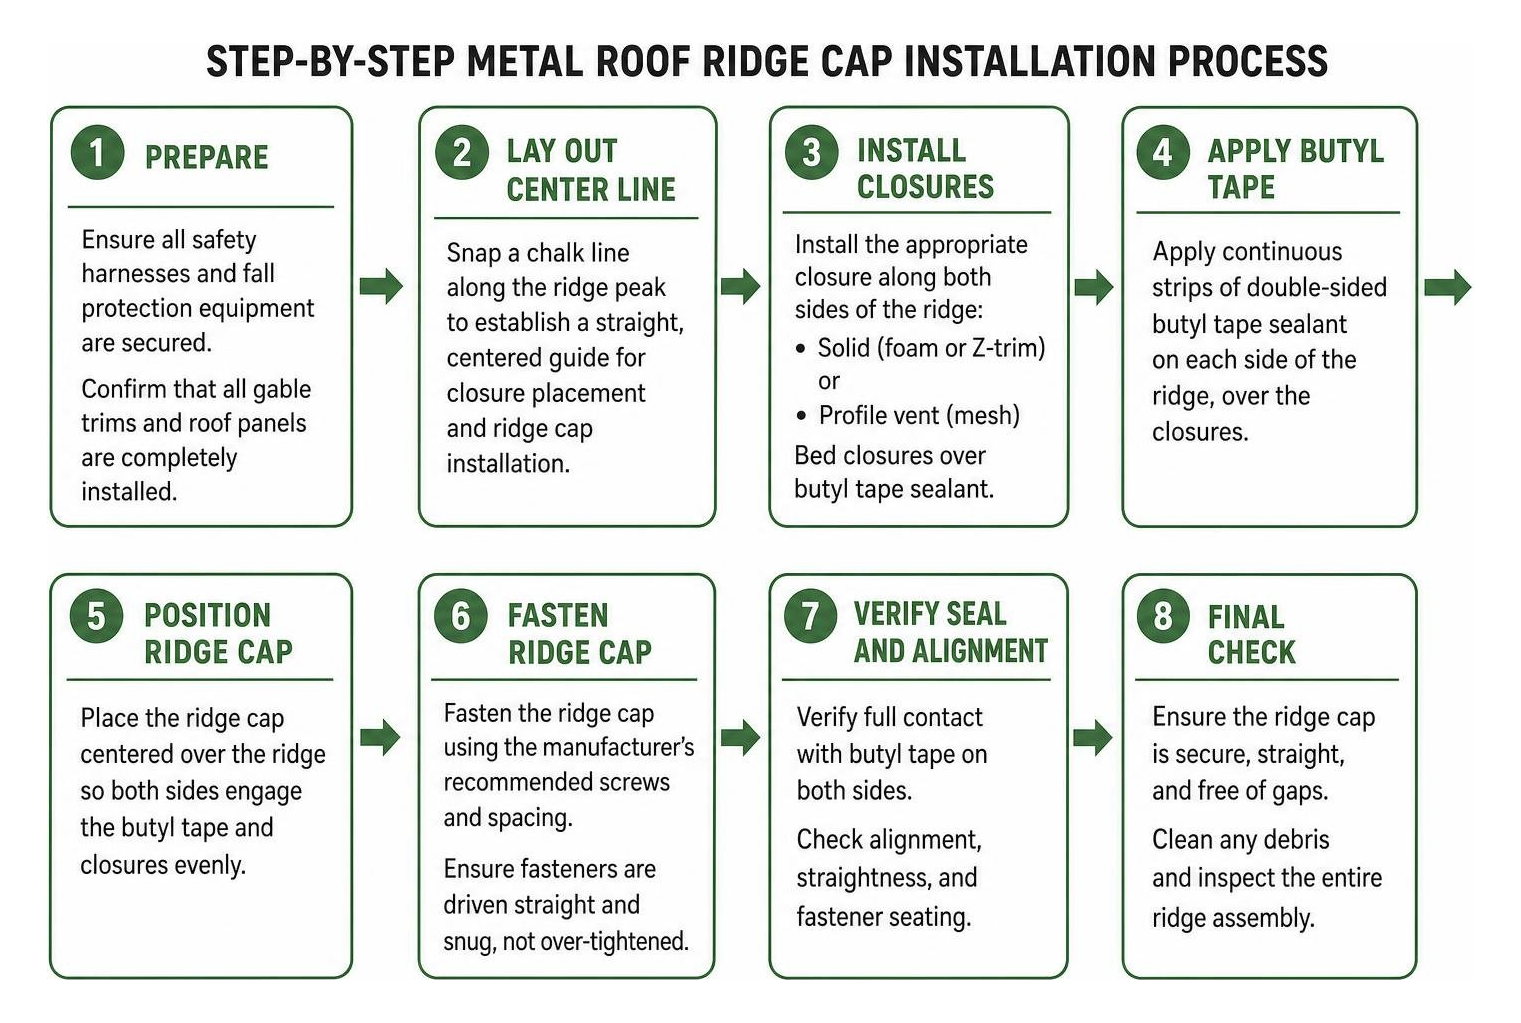
Reviewing technical diagrams of metal roof components highlights how the closure sits between two protective layers of double-sided butyl tape sealant, creating a watertight mechanical gasket.
Need Help With Your Home?
TJ Builders & Developers handles roofing, siding, gutters, windows, home additions, and fire damage restoration for homes and businesses in Lakewood, Crystal Lake, Schaumburg, and nearby McHenry County towns.
- Free, no-obligation estimates
- Licensed & insured
- 20+ years of local experience
Step-by-Step Metal Roof Ridge Cap Installation Process
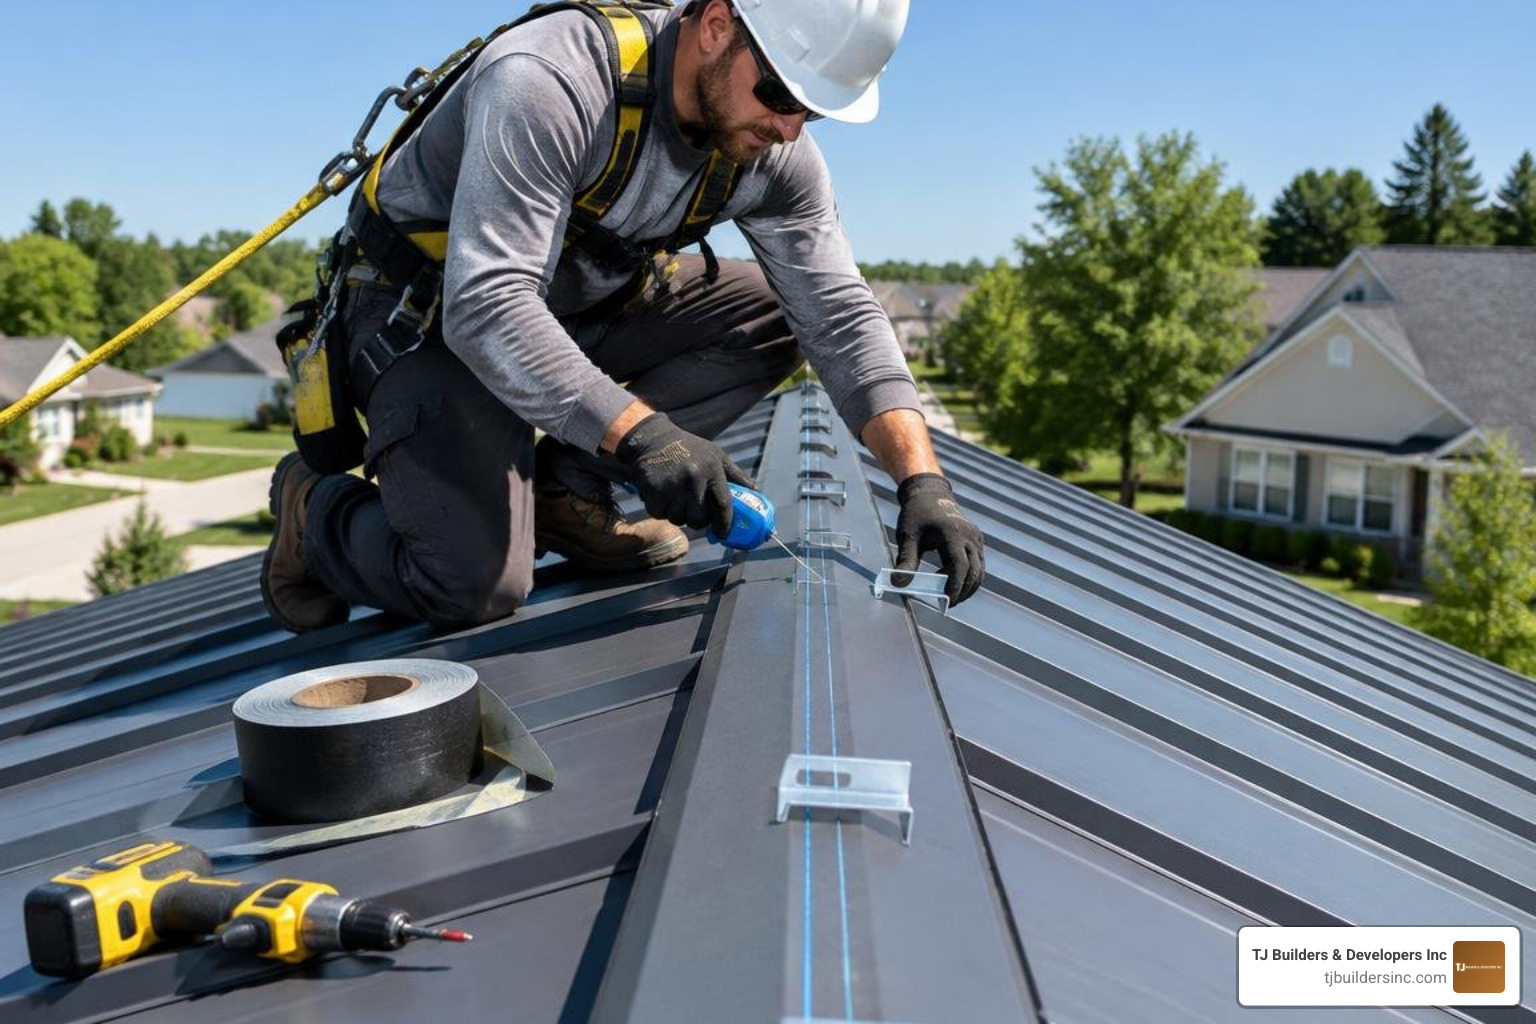
Before beginning the installation, ensure all safety harnesses and fall protection equipment are secured, and confirm that all gable trims and roof panels are completely installed.
Essential installation tools and materials include:
- Cordless screw gun with adjustable torque clutch
- Pop rivet tool and duckbill sheet metal locking pliers
- Snips (left, right, and straight cut aviation snips)
- Chalk line and marking pencil
- Double-sided butyl tape (3/16″ x 7/8″)
- Gasketed metal-to-wood or self-drilling stitch screws (#12 x 3/4″ or #10 x 1-1/2″)
- Structural pop rivets (1/8″ or 3/16″ stainless steel or aluminum)
- Class-compliant neutral-cure exterior metal roof sealant
Closed Metal Roof Ridge Cap Installation Steps
Installing a closed ridge cap on standing seam or exposed-fastener roofs creates a rigid, weather-tight seal:
- Mark the Layout: Snap a clean chalk line along both sides of the ridge, parallel to the peak, marking where the bottom hem of the ridge cap will rest.
- Apply Sealant Tape: Lay a continuous line of double-sided butyl tape 1/4 inch above the chalk line across the roof panels. Do not stretch the tape; press it down firmly and peel back the protective paper.
- Install the Z-Closures: Cut individual Z-trim sections to fit precisely between the standing seam ribs (or lay interlocking solid foam closures across exposed-fastener profiles). Press the closures down onto the butyl tape. Fasten the bottom leg of the Z-trim into the roof deck using #10 x 1″ pancake head screws, placing fasteners 3 inches apart (minimum 4 screws per closure).
- Apply Upper Sealant: Lay another continuous bead of butyl tape or exterior sealant along the top horizontal leg of the installed Z-trim.
- Position and Fasten the Ridge Cap: Center the 10’6″ ridge cap piece over the roof peak. Hook the hemmed edges of the cap over the Z-closures. Secure the cap to the Z-closures using pop rivets spaced 18 inches apart along the length of the ridge, or drive gasketed lap-tek screws through the ribs on exposed-fastener systems.
- Lap Successive Pieces: Overlap each subsequent piece of ridge cap by 6 inches, applying two parallel runs of butyl tape across the lap joint before mechanical fastening.
These methods follow the core techniques detailed in our standing seam installation methods.
Vented Metal Roof Ridge Cap Installation and Deck Preparation
A vented installation introduces attic exhaust while preserving weather protection:
- Prepare the Ridge Slot: Before installing panels, verify the roof decking has a 2-inch continuous slot cut on each side of the ridge peak (a 4-inch total opening). When cutting an existing deck, set your circular saw depth precisely to the thickness of the decking (e.g., 3/4″ plywood) to ensure you do not cut into structural roof trusses or rafters.
- Terminate Panels Correctly: Stop metal panels 2 inches short of the roof center line on both slopes according to engineered standing seam trim specifications. This maintains an unobstructed 4-inch chimney channel for thermal exhaust.
- Set Anchor Clips: Fasten structural anchor clips to the panel seams, setting them back approximately 1 inch from the ridge cap line to conceal the ventilation hardware beneath the finished trim.
- Roll Out Profile Venting: Apply butyl tape across the panel flats and adhere the continuous profile vent material over the tape. Thread the vent mesh through the anchor clips, ensuring it makes full contact with the metal without bunching.
- Secure Ridge Cap: Place the ridge cap centered over the profile vent and anchor clips. Fasten the cap into the clips or panel ribs using #12 x 3/4″ stitch screws equipped with weather-tight EPDM sealing washers.
Essential Fastening, Overlapping, and Sealing Techniques
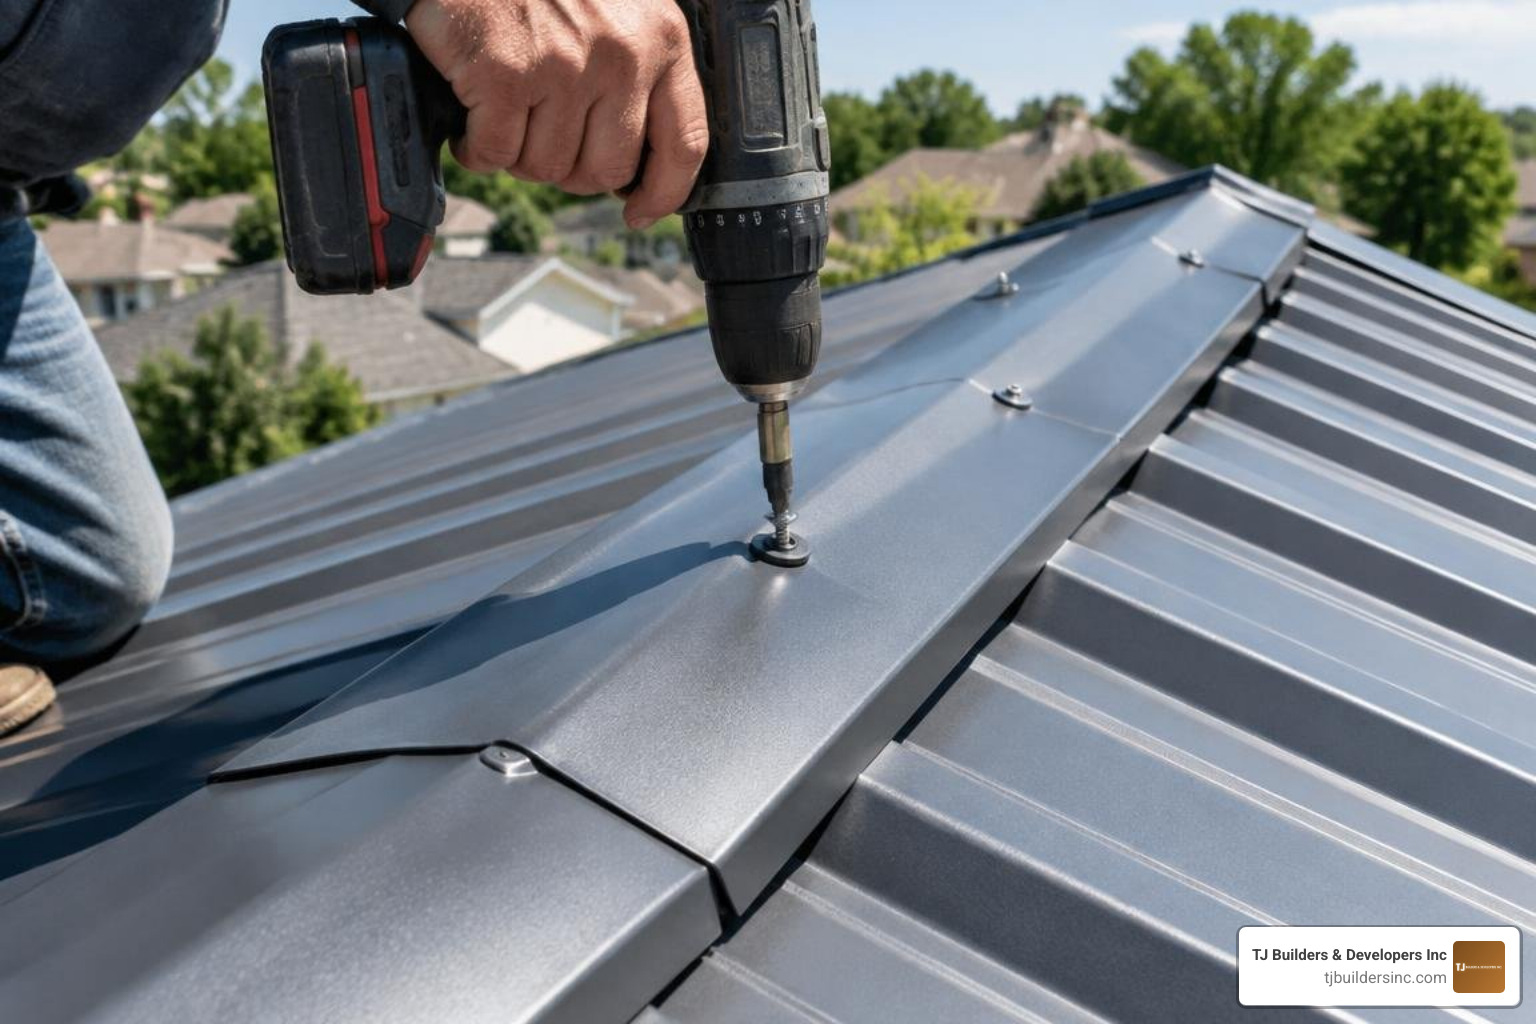
A metal roof expands and contracts daily with seasonal temperature swings. Fastening techniques must lock out wind and moisture while accommodating this natural thermal movement.
Fastener Placement and Expansion Management
Proper torque control is essential when driving fasteners into metal roofing trim:
- Screw Selection: Use corrosion-resistant #12 x 3/4″ stitch screws for metal-to-metal connections (such as ridge cap to Z-trim), or #10 x 1-1/2″ woodgrip screws when anchoring through panel ribs into solid timber decking.
- Rivet Spacing: On standing seam systems utilizing cleats and Z-bars, space structural pop rivets 18 inches apart along both sides of the ridge cap.
- Washer Compression: Drive fasteners perpendicular to the roof plane. The EPDM sealing washer should be compressed flat until its black rubber rim is flush with the metal washer edge. Overdriving crushes the washer outward, splitting the rubber and creating a leak; underdriving leaves an unsealed gap.
- Rib Placement: On exposed-fastener profiles, always place fasteners through the high ribs of the panel rather than the low water flats, as outlined in our guide to corrugated panel roofing details.
Weatherproofing Gable Ends and Ridge Overlaps
The gable end is the most vulnerable point along the entire ridge line. Leaving the end of a ridge cap open exposes the attic directly to wind-driven rain and snow.
To finish a gable termination professionally:
- Extend the ridge cap 1 inch past the gable rake edge.
- Mark the centerline of the peak and make a 45-degree relief notch into the downward legs of the cap using aviation snips.
- Use duckbill sheet metal locking pliers to fold the 1-inch extended tab 90 degrees downward over the gable trim.
- Tuck the folded edge tight against the rake flashing, seal the internal joint with neutral-cure sealant, and secure it with pop rivets.
- For longitudinal laps along the ridge, maintain a strict 6-inch overlap. Always install ridge cap sections starting from the end opposite the prevailing wind direction so the exposed lap seams face away from oncoming storm fronts.
Need Help With Your Home?
TJ Builders & Developers handles roofing, siding, gutters, windows, home additions, and fire damage restoration for homes and businesses in Lakewood, Crystal Lake, Schaumburg, and nearby McHenry County towns.
- Free, no-obligation estimates
- Licensed & insured
- 20+ years of local experience
Preventing Common Ridge Cap Failures and Maintenance Issues
Even heavy-gauge steel systems can fail prematurely if small maintenance details are neglected. Common problems include:
- Sealant Degradation: Exposed silicone sealant around fastener penetrations and laps hardens, shrinks, and cracks after 8 to 12 years of UV exposure. In contrast, double-sided butyl tape sealed internally beneath the metal cap remains flexible and watertight for decades.
- Fastener Back-Out: Thermal expansion causes roof panels to cycle through microscopic movements daily. Over time, wood screws installed into low-grade purlins can loosen and back out. Inspecting fasteners every two to three years prevents wind uplift damage.
- Corrosion From Metal Shavings: Cutting ridge caps with high-speed abrasive saw wheels sends hot, jagged metal filings across the painted finish. These hot filings melt into the paint and rust within weeks. Always cut trim with hand snips, electric shears, or dedicated cold-cut metal blades, and immediately sweep all loose shavings off the roof.
- Galvanic Corrosion: Mixing dissimilar metals—such as using copper ridge caps on Galvalume panels, or driving untreated steel fasteners into aluminum trim—causes rapid electrochemical corrosion that destroys panel integrity.
If an older installation develops localized leaks from backed-out screws or punctured metal, review our procedures for routine roofing repairs and punctured panel maintenance.
Frequently Asked Questions About Metal Roof Ridge Caps
How much should metal ridge cap pieces overlap?
Metal ridge cap pieces should overlap a minimum of 4 to 6 inches at each joint, with 6 inches representing the residential industry standard. Standard ridge cap trim is manufactured in 10-foot-6-inch lengths, which provides exactly 10 linear feet of net coverage after accounting for the 6-inch end lap. Always place two parallel beads of double-sided butyl tape inside the overlap zone before securing the joint with mechanical rivets or stitch screws.
What is the difference between a ridge cap and a ridge vent?
A ridge cap is the solid metal trim flashing that spans and seals the roof peak against exterior weather. A ridge vent is a specialized ventilation system consisting of a continuous opening cut into the roof decking paired with a breathable profile mesh. In a vented system, the ridge cap sits on top of the ridge vent mesh, shielding the exhaust opening from precipitation while allowing attic air to escape.
How long do metal roof ridge caps last before needing resealing?
When formed from heavy 24-gauge or 26-gauge Galvalume or PVDF-coated steel, the metal ridge cap itself lasts 40 to 70 years—matching the lifespan of the roof panels. However, the external rubber EPDM washers on exposed fasteners and any topical silicone sealants typically degrade after 8 to 12 years due to UV exposure and temperature swings. We recommend scheduling a professional roof inspection every few years to check fastener torque and re-seal washer heads as needed.
Conclusion
A metal roof provides exceptional durability, wind resistance, and energy efficiency, but its performance relies entirely on the integrity of the ridge cap assembly. From matching closure profiles and selecting 24- or 26-gauge steel to managing thermal movement with correct fastener compression, precise installation ensures your roof peak remains weather-tight through decades of severe Midwest storms.
Whether your home requires a high-flow vented ridge system to balance attic moisture or a rugged closed standing seam assembly to shed heavy winter snow, quality workmanship protects your property. For full details on residential roof replacements, panel specifications, and exterior restoration services throughout Lakewood, Crystal Lake, Schaumburg, and surrounding communities, explore our comprehensive roof installation and replacement guide.