When Water Gets In: Finding the best seal for roof leaks
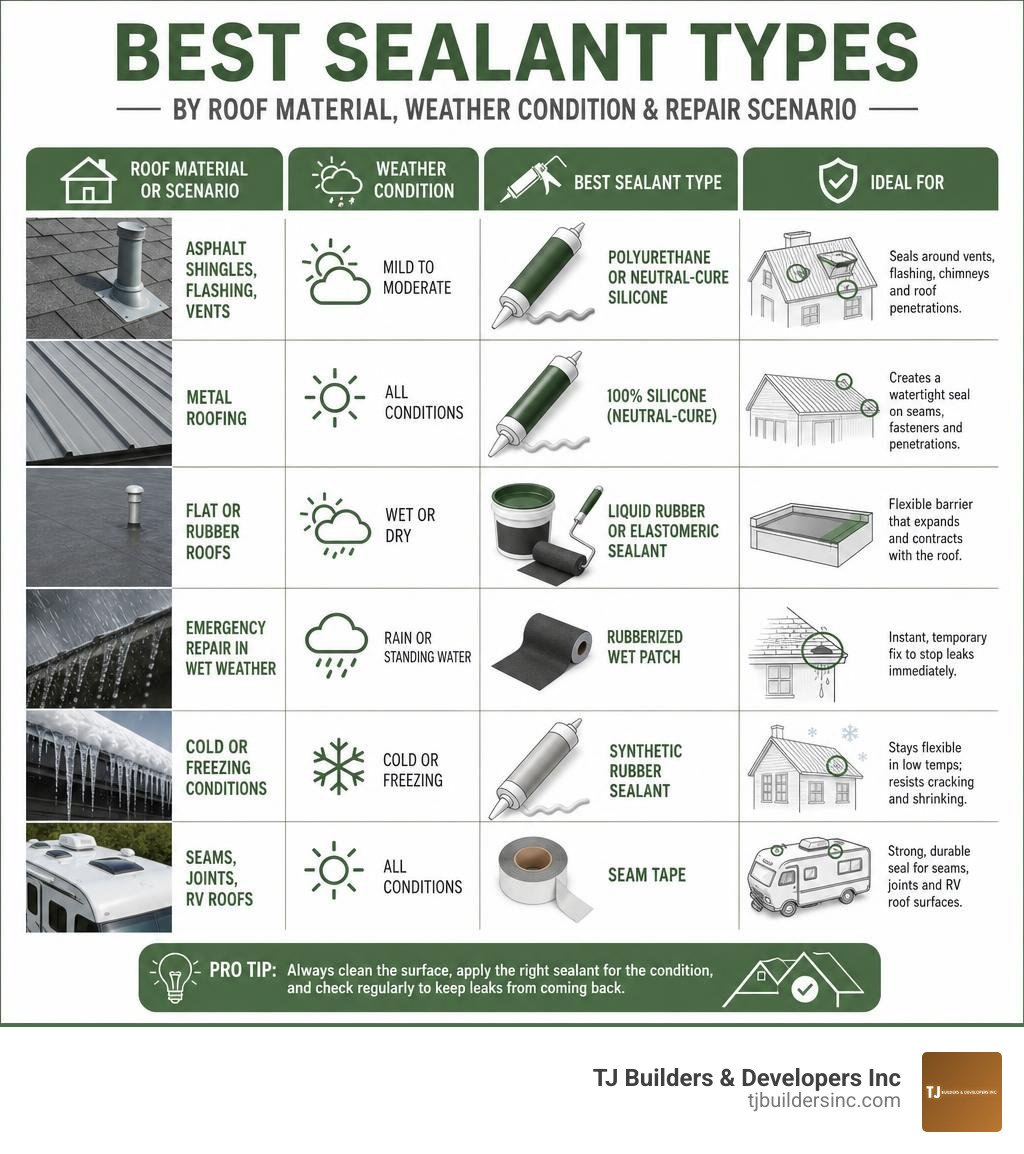
The best seal for roof leaks depends on your roofing material, weather conditions, and the size of the damaged area. Here’s a quick-reference guide:
| Situation | Best Sealant Type |
|---|---|
| Asphalt shingles, flashing, vents | Polyurethane or neutral-cure silicone |
| Metal roofing | 100% silicone (neutral-cure) |
| Flat or rubber roofs | Liquid rubber or elastomeric sealant |
| Emergency repair in wet weather | Rubberized wet patch (e.g., Henry 209XR) |
| Cold or freezing conditions | Synthetic rubber sealant (e.g., DAP Ultra Clear) |
| Seams, joints, RV roofs | Seam tape (e.g., EternaBond RoofSeal) |
A small roof leak rarely stays small. Water entering through a hairline crack in flashing can travel along rafters and joists for several feet before it ever shows up as a ceiling stain — making the actual source of the leak surprisingly hard to find.
Roofs are under constant stress. Temperature swings, wind, UV exposure, and heavy rain gradually wear down the seals around vents, chimneys, skylights, and valleys. When those seals fail, water finds a way in — and it doesn’t need much of an opening to cause serious damage.
The good news? The right sealant, applied correctly, can stop a leak in its tracks — and in some cases, prevent one from starting.
I’m Thomas Pruszynski, owner of TJ Builders & Developers, and over more than 20 years of hands-on roofing and exterior restoration work across Northern Illinois, I’ve seen how choosing the best seal for roof leaks — and applying it properly — can mean the difference between a quick fix and a costly repair. In the sections below, I’ll walk you through exactly what to use, when to use it, and how to make it last.
Best seal for roof leaks vocab to learn:
Common Vulnerabilities: Where Roof Leaks Start
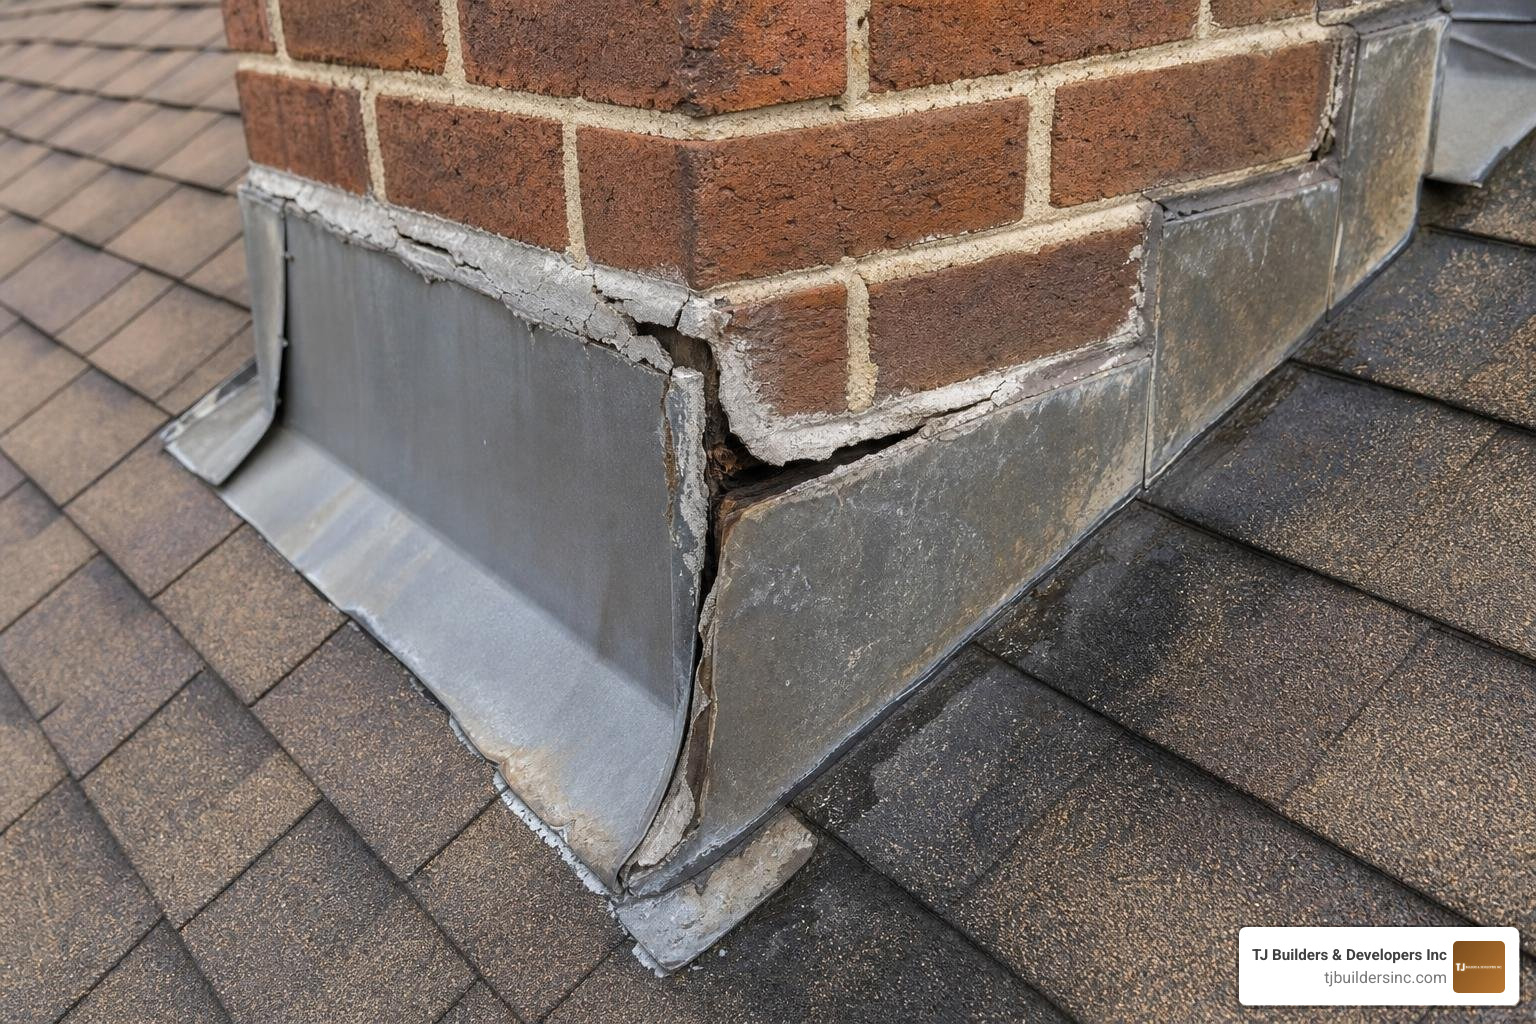
Before you can apply the best seal for roof leaks, you have to know where to look. Water is incredibly opportunistic. It doesn’t just fall straight down; it tracks along the underside of roof decking, slips behind building paper, and runs along framing members. A ceiling stain in your living room could easily be caused by a failed seal around a roof vent ten feet away.
When we perform a professional roof leak inspection for homeowners in Crystal Lake, Lakewood, or Schaumburg, we always start by checking the most common trouble spots:
- Flashing: These are the thin metal strips installed along the joints of your roof to redirect water away from critical areas. Over time, the sealant holding the flashing in place dries out, cracks, or pulls away, leaving a clear path for water.
- Chimneys: Chimneys are notorious leak sources. They require both step flashing woven into the shingles and counter-flashing embedded into the brick mortar joints. If the mortar crumbles or the sealant at the top of the counter-flashing fails, water will seep directly into your home’s framing.
- Roof Vents and Plumbing Stacks: Plastic vent hoods can crack after years of intense UV exposure, and the rubber gaskets (or boots) around plumbing stacks are highly prone to dry rot. Once the rubber splits, water runs straight down the pipe into your attic.
- Skylights: While skylights bring beautiful natural light into a home, they are essentially giant holes in your roof. If the perimeter seals or the insulated glass units fail, they will leak.
- Valleys: A valley is where two roof slopes meet. Because valleys channel massive volumes of rainwater during heavy downpours, any compromise in the valley lining or shingles will quickly lead to a major leak.
- Ice Dams: During cold Northern Illinois winters, snow on the upper parts of a roof can melt, run down to the colder eaves, and refreeze. This creates a dam of ice that traps melting water, forcing it upward under the shingles.
Understanding these high-risk areas helps you target your maintenance and catch minor issues before they turn into structural headaches.
Need Help With Your Home?
TJ Builders & Developers handles roofing, siding, gutters, windows, home additions, and fire damage restoration for homes and businesses in Lakewood, Crystal Lake, Schaumburg, and nearby McHenry County towns.
- Free, no-obligation estimates
- Licensed & insured
- 20+ years of local experience
How to Choose the Best Seal for Roof Leaks
Not all roof sealants are created equal. Applying the wrong product to a specific roofing material can result in a bond that fails within weeks — or worse, chemically degrades the roof itself.
To help you choose the right product, let’s break down the main chemical bases available on the market:
| Sealant Type | Key Features | Best Used For | Limitations |
|---|---|---|---|
| Silicone | Outstanding UV resistance, highly flexible, waterproof, long-lasting. | Metal roofs, skylights, glass, tile, EPDM. | Does not adhere well to dirty surfaces; cannot be painted; incompatible with asphalt coatings. |
| Polyurethane | Extremely tough, highly adhesive, paintable, excellent impact resistance. | Flashing, joints, wood, masonry, shingle tabs. | Can be difficult to apply in freezing temperatures; degrades faster under direct UV if unpainted. |
| Acrylic | Water-based, easy to apply, highly reflective, cost-effective. | Vertical joints, UV-reflective coatings. | Shrinks during curing; poor resistance to standing or ponding water; prone to cracking over time. |
| Rubberized Asphalt | Tar-based, highly sticky, works on wet surfaces, traditional repair compound. | Shingle repairs, flat roof patches, emergency wet-weather fixes. | Becomes brittle in extreme cold; short service life; unsightly black appearance. |
When evaluating these options, look for key performance features like UV resistance, flexibility (the ability to expand and contract without cracking), and a high waterproof rating. For a deeper dive into how independent experts rate these categories, check out the This Old House Roof Sealant Guide.
Finding the Best Seal for Roof Leaks on Metal and Shingle Roofs
When dealing with metal roofs, thermal expansion is your biggest enemy. Metal panels expand and contract significantly as temperatures shift from hot summer afternoons to cool nights. To handle this constant movement, you need a sealant with exceptional elasticity.
A 100% neutral-cure silicone sealant is generally the premier choice for metal. Unlike acetic-cure silicones (which smell like vinegar and can chemically corrode metal and degrade asphalt), neutral-cure silicone forms an incredibly flexible, waterproof, and non-corrosive bond. It stands up to extreme temperature swings and is highly resistant to UV degradation. If you are dealing with a punctured metal panel or a backed-out fastener, we outline several reliable patch methods in our guide to metal roof repair.
For asphalt shingles, polyurethane sealants are highly effective. They offer incredible adhesion to asphalt, wood, and masonry, making them perfect for securing loose shingle tabs or sealing flashing joints.
If aesthetics are a priority — such as on highly visible areas of a light-colored roof — a crystal-clear synthetic rubber sealant like DAP Ultra Clear Roof Sealant is an excellent alternative. It provides a completely invisible, highly flexible seal that won’t yellow, chalk, or crack over time, outperforming traditional black asphalt tars.
The Best Seal for Roof Leaks in Wet or Freezing Weather
Roof leaks rarely wait for a warm, sunny day. If you wake up to a dripping ceiling during a freezing winter storm or a heavy spring downpour, you can’t wait for the roof to dry out before taking action. You need an emergency wet patch.
Standard caulks and sealants require a completely dry surface to bond. If applied to a wet surface, they will simply float on top of the water film and fail to adhere. True emergency sealants are formulated with specialized solvents and oils that displace water, allowing the product to bite directly into the wet substrate.
For active leaks in severe weather, we highly recommend a premium rubberized wet patch, such as Henry 209 Extreme Wet Patch Roof Leak Repair. This ultra-premium elastomer-modified sealant is specifically engineered to penetrate standing water and form an immediate, rubberized seal on wet surfaces. It remains highly flexible even in sub-zero temperatures, meaning it won’t crack when the repaired joint expands during cold-weather cycles.
If you are dealing with a sudden winter leak, check out our checklist on emergency roof repair to keep your home protected until a professional crew can perform a permanent fix.
Step-by-Step: How to Properly Apply Roof Sealant
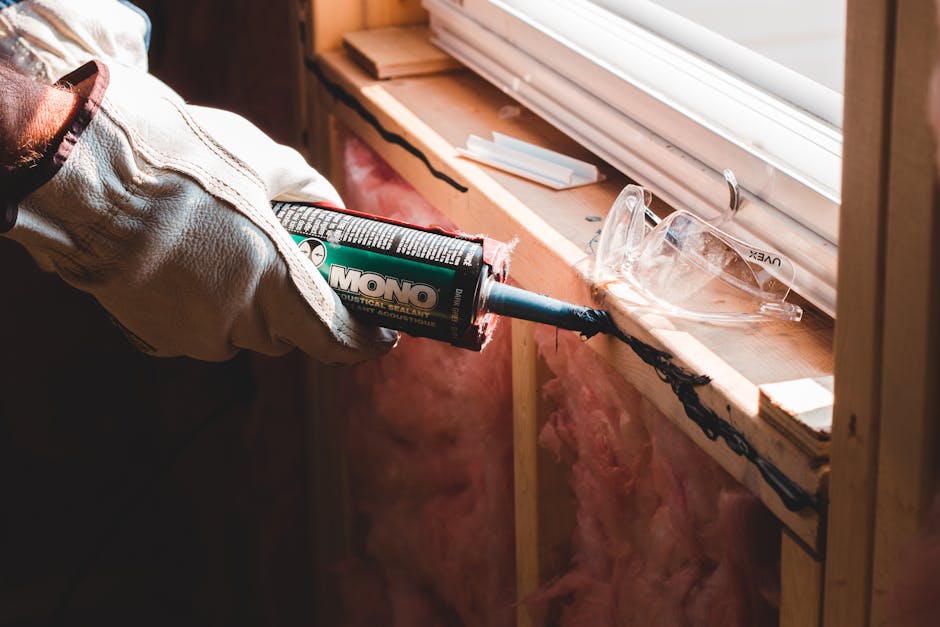
Applying roof sealant is a lot like painting: 90% of your success depends on the preparation work. If you slap high-quality sealant over dirt, moss, or failing old caulk, the new sealant will simply peel away along with the debris.
Here is the exact process our team uses to ensure a long-lasting, watertight seal around roof penetrations:
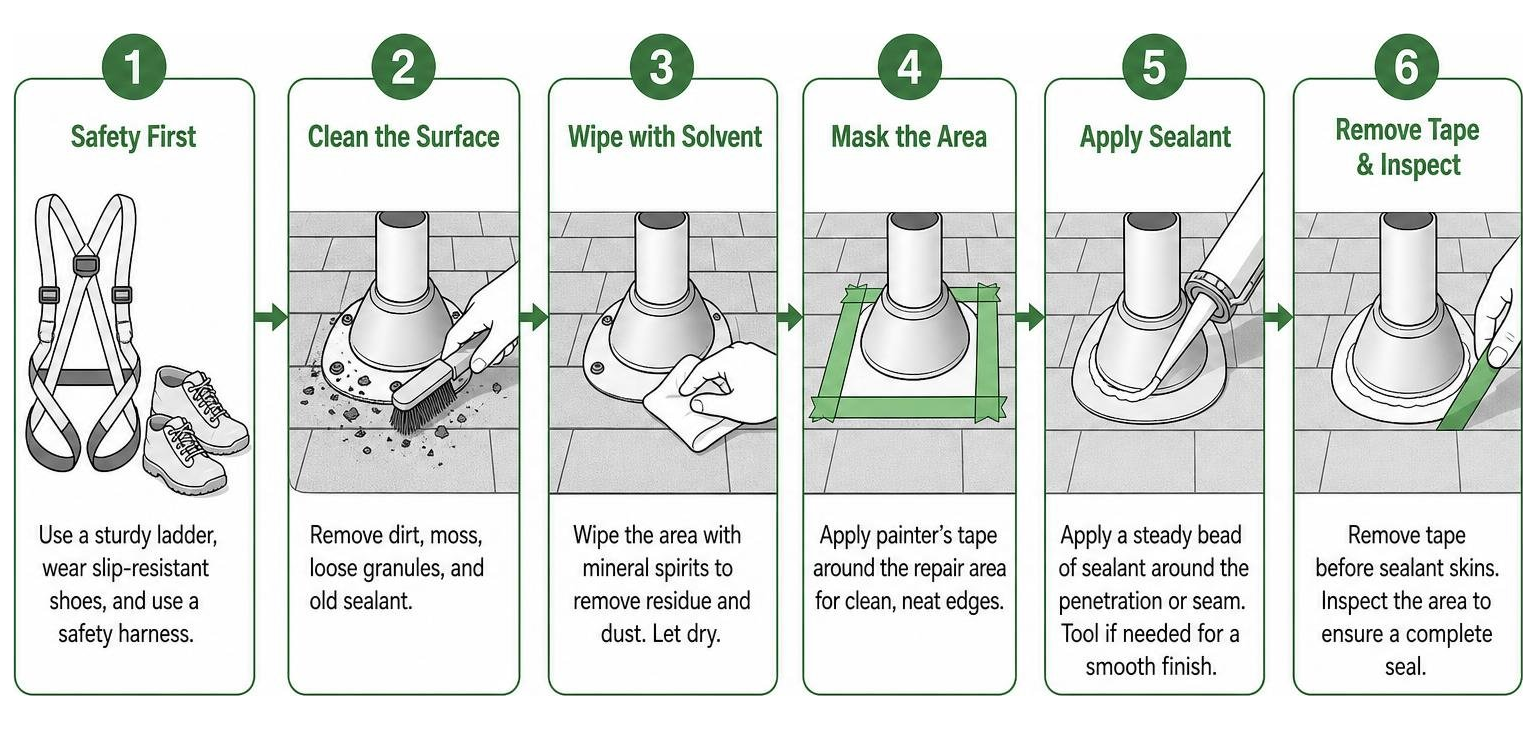
Step 1: Safety First
Before climbing onto your roof, ensure you have a sturdy ladder, wear slip-resistant shoes, and use a safety harness if you are working on a steep slope. Never work on a wet or icy roof unless it is an absolute emergency — and even then, extreme caution is required.
Step 2: Clean the Surface
Use a stiff wire brush or a plastic putty knife to scrape away all dirt, moss, loose shingle granules, and old, cracked sealant from the repair area. Be careful not to gouge the underlying roofing material. Once the heavy debris is removed, wipe the area down with a solvent like mineral spirits to remove any remaining oily residue or fine dust.
Step 3: Prep the Joint
If you are sealing a gap or joint wider than 3/8 inch, do not try to fill it entirely with sealant. The sealant will sag, shrink, and fail to cure properly. Instead, press a foam backer rod into the joint first. This controls the depth of the sealant and ensures it bonds only to the sides of the joint, allowing it to expand and contract properly.
Step 4: Apply the Sealant
Cut the nozzle of your sealant cartridge at a 45-degree angle to match the width of the joint you are filling. Puncture the inner foil seal, load the tube into a high-quality caulk gun, and apply a continuous, steady bead. Push the gun forward along the joint rather than pulling it; this forces the sealant deep into the gap for a stronger bond.
Step 5: Tool and Smooth the Bead
Using a gloved finger or a specialized smoothing tool, press and smooth the sealant bead into the joint. This eliminates air pockets, shapes the sealant to shed water, and ensures maximum surface contact for a secure bond.
Step 6: Allow to Cure
Most high-quality sealants are “rain-ready” within 30 minutes to a few hours, but they require a full 24 to 48 hours to fully cure. Avoid disturbing the repair during this time.
For more detailed tips on managing common residential roof issues, take a look at our quick guide to fixing roof leaks.
Need Help With Your Home?
TJ Builders & Developers handles roofing, siding, gutters, windows, home additions, and fire damage restoration for homes and businesses in Lakewood, Crystal Lake, Schaumburg, and nearby McHenry County towns.
- Free, no-obligation estimates
- Licensed & insured
- 20+ years of local experience
Frequently Asked Questions About Roof Sealants
Is roof sealant a permanent fix or a temporary solution?
In almost all cases, a topical roof sealant should be viewed as a temporary patch rather than a permanent structural repair. While a high-quality sealant can easily stop a leak and protect your home for several years, it does not address the underlying cause of the failure — such as rusted flashing, rotted roof decking, or worn-out shingles.
True, long-term protection relies on professional workmanship, proper metal flashing integration, and high-quality underlayments. If your roof is approaching the end of its lifespan, relying on repeated applications of sealant is a losing battle.
What is the difference between a roof coating and a roof sealant?
While the terms are sometimes used interchangeably, they serve very different purposes:
- Roof Sealant: A thick, localized compound (usually applied via caulk gun, trowel, or brush) designed to fill deep gaps, seal joints, and patch specific penetrations like vents, chimneys, and flashing.
- Roof Coating: A thinner, liquid membrane (applied with a roller, brush, or sprayer) designed to cover the entire surface of a roof. Coatings are typically used on flat or low-slope roofs to provide broad UV protection and prevent water intrusion across a large area.
How long does a typical roof sealant repair last?
The lifespan of a roof sealant repair depends heavily on the quality of the product used, the accuracy of the application, and the level of environmental exposure.
- Standard Asphalt Tars: Typically last 1 to 3 years before dry-rotting and cracking.
- High-Quality Polyurethanes and Silicones: Can easily last 5 to 10 years under normal weather conditions.
- Heavy-Duty Seam Tapes: Premium pressure-sensitive tapes, such as EternaBond RoofSeal, utilize advanced micro-sealant technology to create a virtually permanent bond that can last 10 to 15+ years when applied to clean, properly prepared surfaces.
Conclusion
Finding the best seal for roof leaks is all about matching the right product to your specific roofing material and weather conditions. Whether you are dealing with a minor flashing gap on a shingle roof or an active leak in the middle of a freezing winter storm, taking the time to prepare the surface and apply a high-quality, flexible sealant will protect your home from costly structural damage.
However, keep in mind that topical sealants are secondary lines of defense. If your roof has suffered widespread wear, soft decking, or extensive flashing failure, a temporary patch won’t solve the real issue.
At TJ Builders & Developers Inc, we have spent over two decades providing homeowners across Northern Illinois — including Lakewood, Crystal Lake, Schaumburg, and surrounding suburbs — with honest advice, reliable workmanship, and durable, long-term roofing solutions. If you suspect your roof needs more than a quick caulk job, reach out to us today to schedule our professional roof repair services and keep your home safe, dry, and secure for years to come.