Dry Verge Installation: What Happens at the Roof Edge
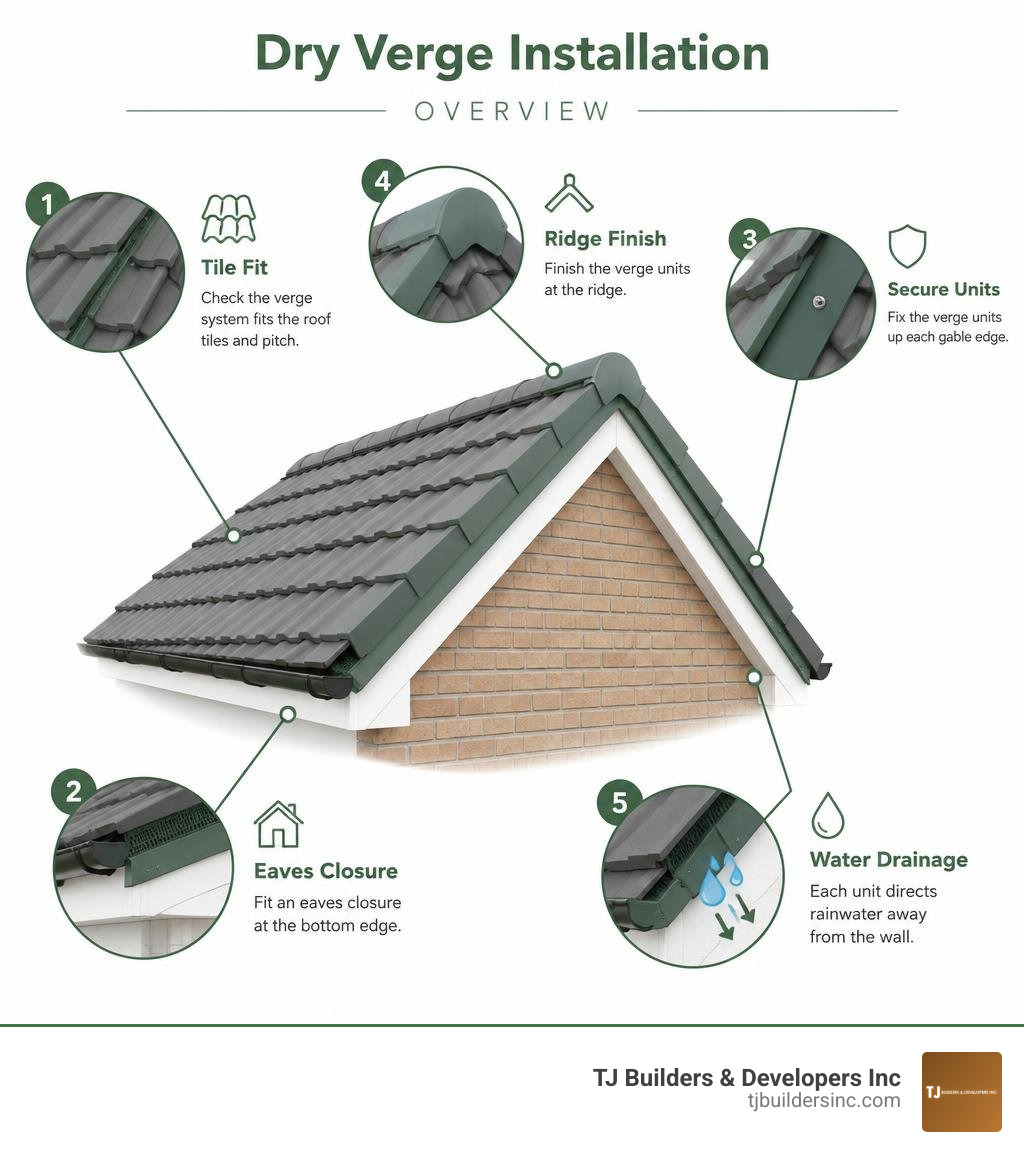
Dry verge installation starts with checking that the verge system fits the roof tiles and pitch. A roofer then checks the batten ends, fits an eaves closure, secures the verge units up each gable edge, and finishes them at the ridge. Each unit must sit against the tiles and direct rainwater away from the wall. The exact overhang and fixings depend on the system, so the manufacturer’s instructions matter.
A dry verge replaces mortar at the roof’s gable edge with mechanically fixed parts. That can avoid the cracking common with mortar, but a loose fixing or blocked drainage path can still lead to trouble. For homeowners, the useful question is not just which system looks best? It is how will the roof edge stay secure and shed water?
I’m Thomas Pruszynski, owner of TJ Builders & Developers Inc. I’ve led exterior home projects for over 20 years, and this guide explains what homeowners should look for in a careful dry verge installation.
Dry verge installation glossary:
Understanding Dry Verge Systems vs. Traditional Mortar Verges
The verge refers to the outer edge of a pitched roof where the tiles meet the gable wall or bargeboard. For decades, the standard way to seal this joint was wet mortar bedding. A mixture of sand and cement was laid along an undercloak board to hold the tile edges down and keep out driving rain.
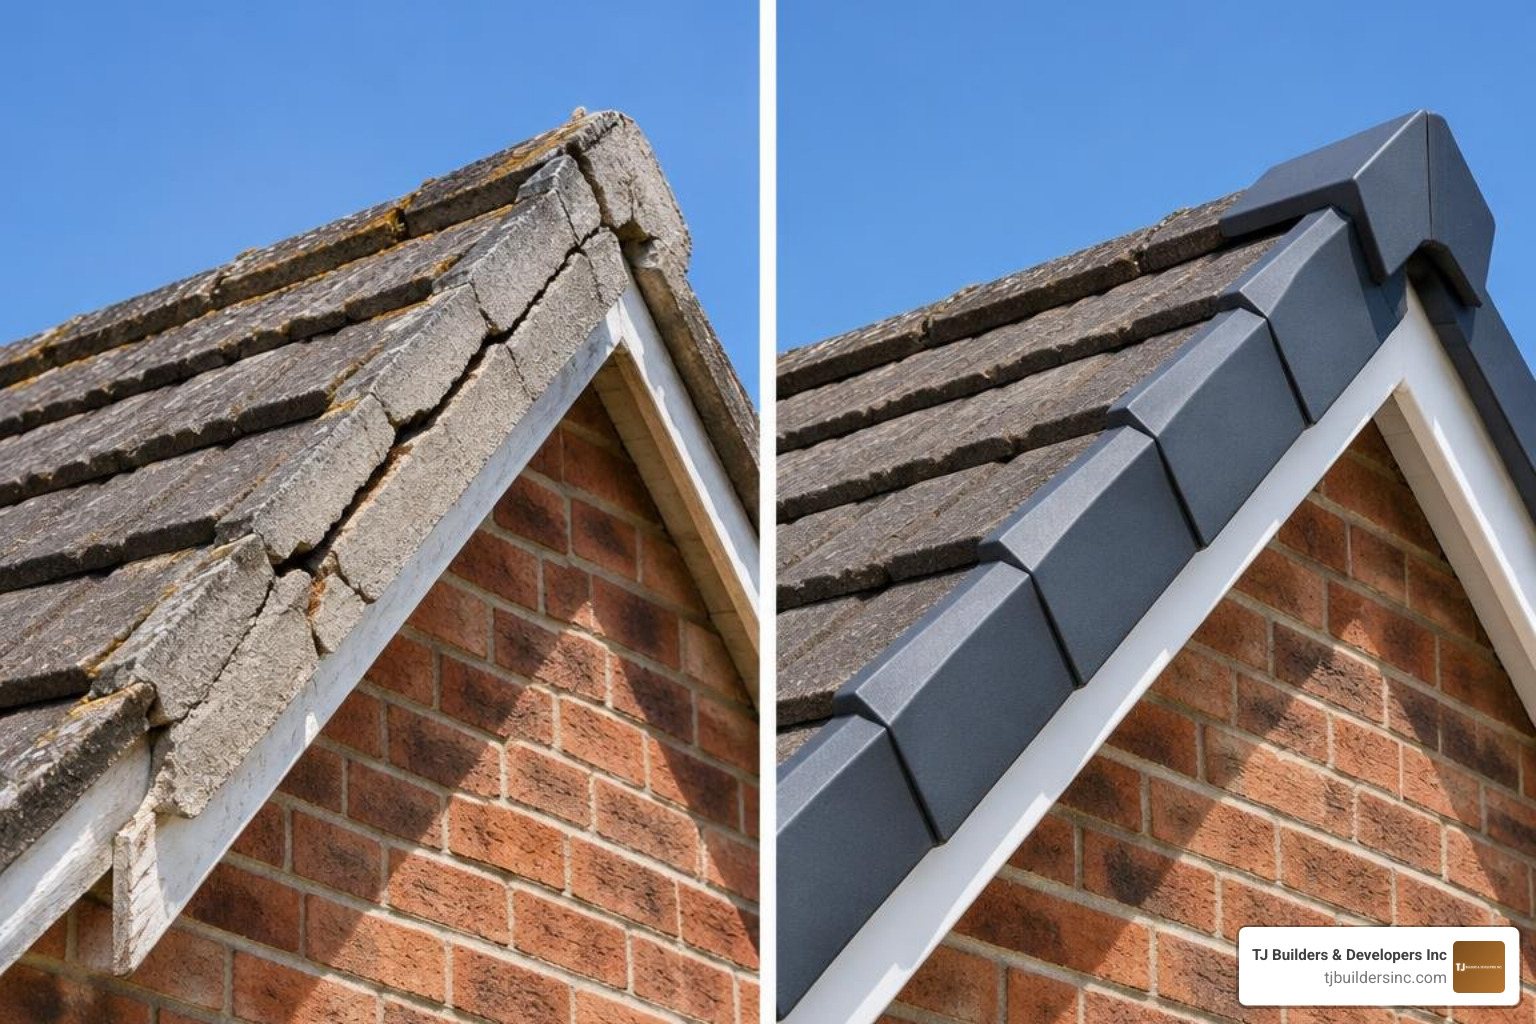
While wet mortar works when freshly applied, it is inherently rigid. As homes naturally settle and experience seasonal expansion, mortar shrinks and develops hairline cracks. Exposure to continuous freeze-thaw cycles worsens these fractures, eventually dislodging mortar chunks and leaving the roof edge vulnerable to wind uplift. Homeowners frequently find themselves booking recurrent roof repair services simply to re-point failing gable edges.
A dry verge system is a mortar-free alternative that uses durable, interlocking capping units made from high-grade polymers, GRP, or pre-formed metal. These components clamp over each tile perimeter mechanically. Because they are not bound by rigid cement, dry verge systems accommodate natural thermal movement while creating an impenetrable barrier against wind and pests.
| Feature / Metric | Traditional Wet Mortar Verge | Modern Dry Verge System |
|---|---|---|
| Fixing Method | Chemical bond (sand/cement mix) | Pure mechanical fixing (screws, nails, clips) |
| Vulnerability to Weather | High (cracking from freeze-thaw cycles) | Minimal (UV-stabilized, flexible polymers) |
| Maintenance Needs | Repointing needed every 10–15 years | Virtually maintenance-free |
| Installation Speed | Slower; dependent on dry weather | Fast; installable in broad temperature ranges |
| Wind Uplift Resistance | Degrades as mortar deteriorates | High continuous perimeter security |
| Water Management | Relies on mortar angle to shed water | Integrated drainage channels and drip lips |
Mechanics and Benefits of Mortar-Free Roof Edges
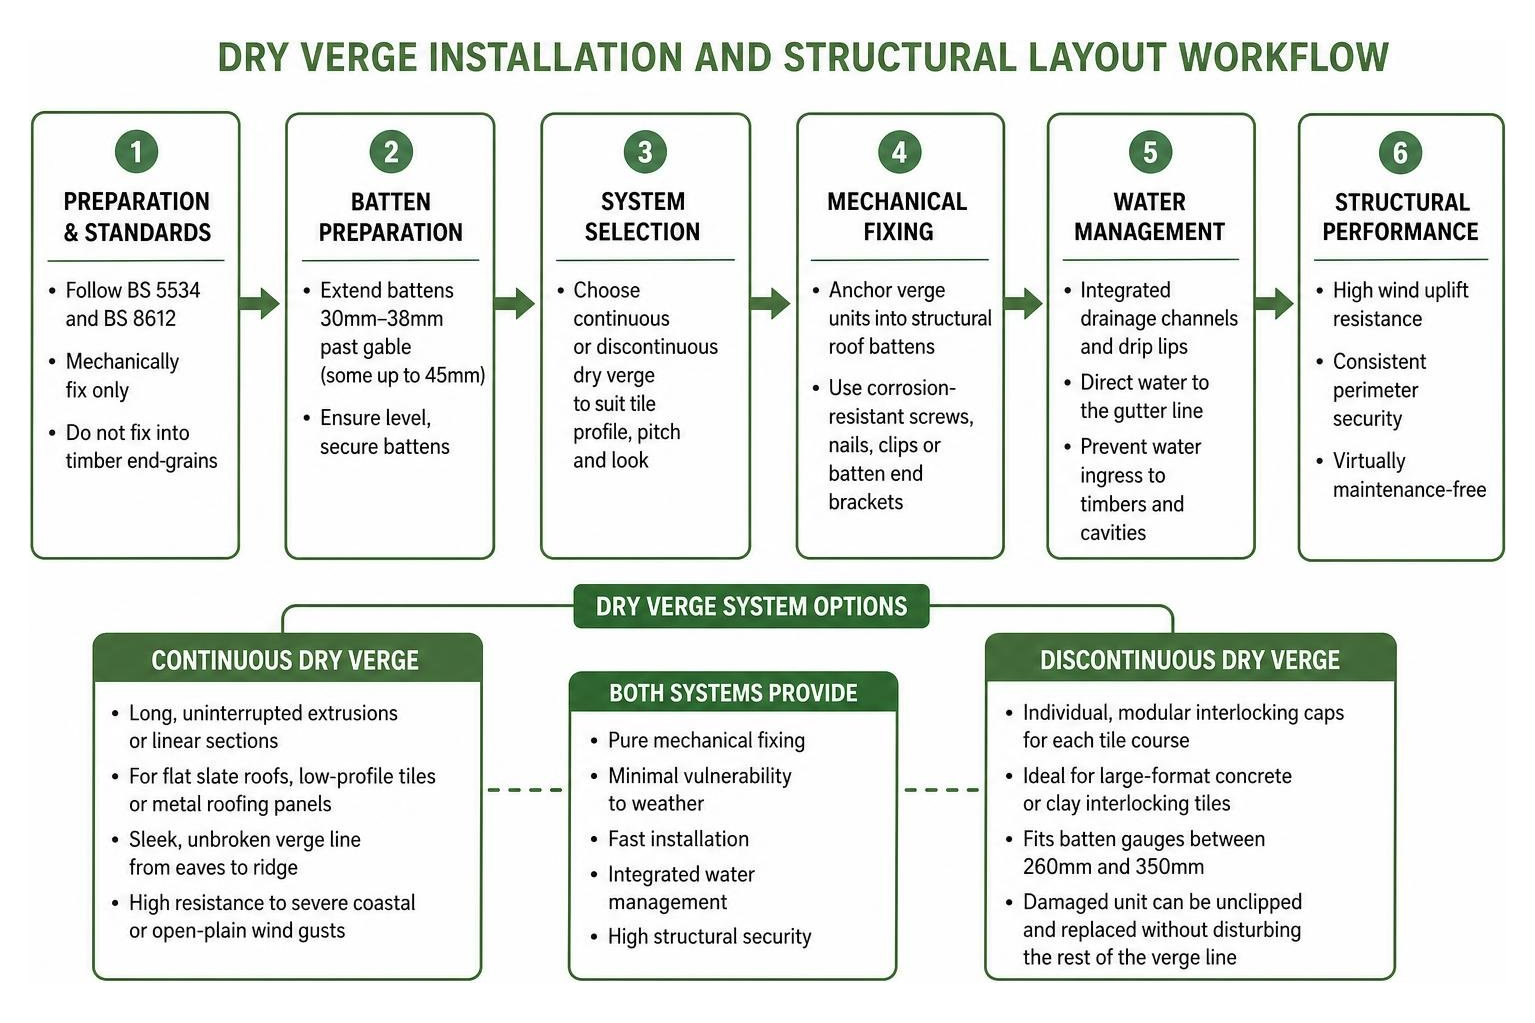
The primary advantage of mechanical edge fixing is consistent structural security. Modern dry verge systems anchor directly into structural roof battens using corrosion-resistant fasteners or batten end brackets. This design meets stringent wind loading requirements by mechanically holding down the roof’s perimeter tiles—the exact zone most vulnerable to negative wind pressure during severe storms.
Beyond structural hold, eliminating wet mortar prevents water ingress caused by bond failure. Polymer dry verge systems incorporate engineered water paths that catch wind-driven rain and direct it downward into the gutter line rather than letting it seep into roof timbers or brickwork cavities.
Continuous vs. Discontinuous Verge Designs
Dry verge systems fall into two main categories: continuous systems and discontinuous (modular) systems. Choosing the right style depends on your tile profile, roof pitch, and architectural look.
- Discontinuous Dry Verge: These systems use individual, modular interlocking caps fitted to the end of each tile course. They work exceptionally well with large-format concrete or clay interlocking tiles, accommodating batten gauges between 260mm and 350mm. If a single unit is ever damaged, it can be unclipped and replaced without disturbing the rest of the verge line.
- Continuous Dry Verge: Formed as long, uninterrupted extrusions or linear sections, continuous verges are typically specified for flat slate roofs, low-profile tiles, or modern metal roofing panels. They provide a sleek, unbroken verge line from eaves to ridge, offering high resistance to severe coastal or open-plain wind gusts.
Need Help With Your Home?
TJ Builders & Developers handles roofing, siding, gutters, windows, home additions, and fire damage restoration for homes and businesses in Lakewood, Crystal Lake, Schaumburg, and nearby McHenry County towns.
- Free, no-obligation estimates
- Licensed & insured
- 20+ years of local experience
Technical Standards and Preparation for Dry Verge Installation
High-performance roofing requires strict adherence to technical manufacturing and workmanship benchmarks. In modern construction standards, British Standards such as BS 5534 (Code of practice for slating and tiling) and BS 8612 (Specification for dry-fixed ridge, hip, and verge systems) set rigorous performance criteria for mechanical edge fixings. BS 8612 mandates mechanical holding requirements, standardized water drainage testing, and strict rules against fixing directly into vulnerable timber end-grains.
When undertaking roof replacements or major renovations, exterior assemblies must also align with local municipal codes and requirements, such as regional guidelines for roof replacement. These codes ensure every roof component withstands local environmental loads.
Batten Overhang and Preparation for Dry Verge Installation
Precision timber preparation is critical to a level, secure installation:
- Overhang Tolerances: Tiling battens must extend past the outer face of the brick gable or bargeboard by an exact distance—typically between 30mm and 38mm depending on the manufacturer (some systems permit up to 45mm). If battens are cut too short, verge units cannot grip the timber; if cut too long, the units will flare outward and break tile alignment.
- Underlay Projection: The roofing underlay or synthetic membrane should extend across the gable wall, projecting 25mm to 50mm into the cavity or edge detail without extending more than 10mm past the batten ends.
- Apex Spacing: The final top-course batten must be set accurately below the apex—usually no more than 75mm from the rafter point—to ensure the top verge units and the apex ridge cap mate seamlessly without awkward trimming.
Fastener Selection and Splitting Prevention
Fixing dry verge units incorrectly can compromise the timber structure underneath:
- Fasteners: Use heavy-gauge stainless steel screws or minimum 40mm x 3.35mm ring-shank nails. Smooth nails should never be used, as thermal expansion and wind uplift forces can cause them to back out over time.
- Preventing Timber Splitting: Standard BS 5534-graded timber battens can split if fasteners are driven directly into the exposed end-grain. To eliminate splitting risks, quality dry verge systems utilize specialized batten end clips or batten brackets. These steel or polymer brackets slide over the cut batten ends, providing reinforced pilot holes that guide fasteners into the side grain of the wood.
Step-by-Step Verge Assembly and Mechanical Fixing
Achieving a straight, watertight roof edge requires an ordered, step-by-step assembly process. For specialized installations like clay plain tiles, roofers refer to dedicated resources like a Clay plain tiles fixing guide to ensure pitch and lap specifications match the verge profile.
Eaves Starter Units and Perimeter Closures
The foundation of the verge line begins at the bottom eaves course:
- Install the Eaves Closer: Position the eaves starter bracket or eaves closer firmly against the fascia board or bargeboard at the bottom corner of the roof slope.
- Mechanical Fixation: Fasten the eaves closer securely into the fascia or rafter using manufacturer-approved exterior-grade screws.
- Pest Protection: Ensure the starter unit incorporates a bird-comb or integrated grille. This keeps birds, bats, and large insects from crawling into the space under the verge units and nesting within the roof cavity.
Step-by-Step Dry Verge Installation and Alignment
Once the eaves starter is secured, the modular units are installed sequentially up the roof rake:
- Position the Eaves Unit: Slide the first dry verge unit over the eaves closer, ensuring the bottom lip locks firmly into the starter bracket. Push the inner cavity of the unit flush over the profile of the eaves tile.
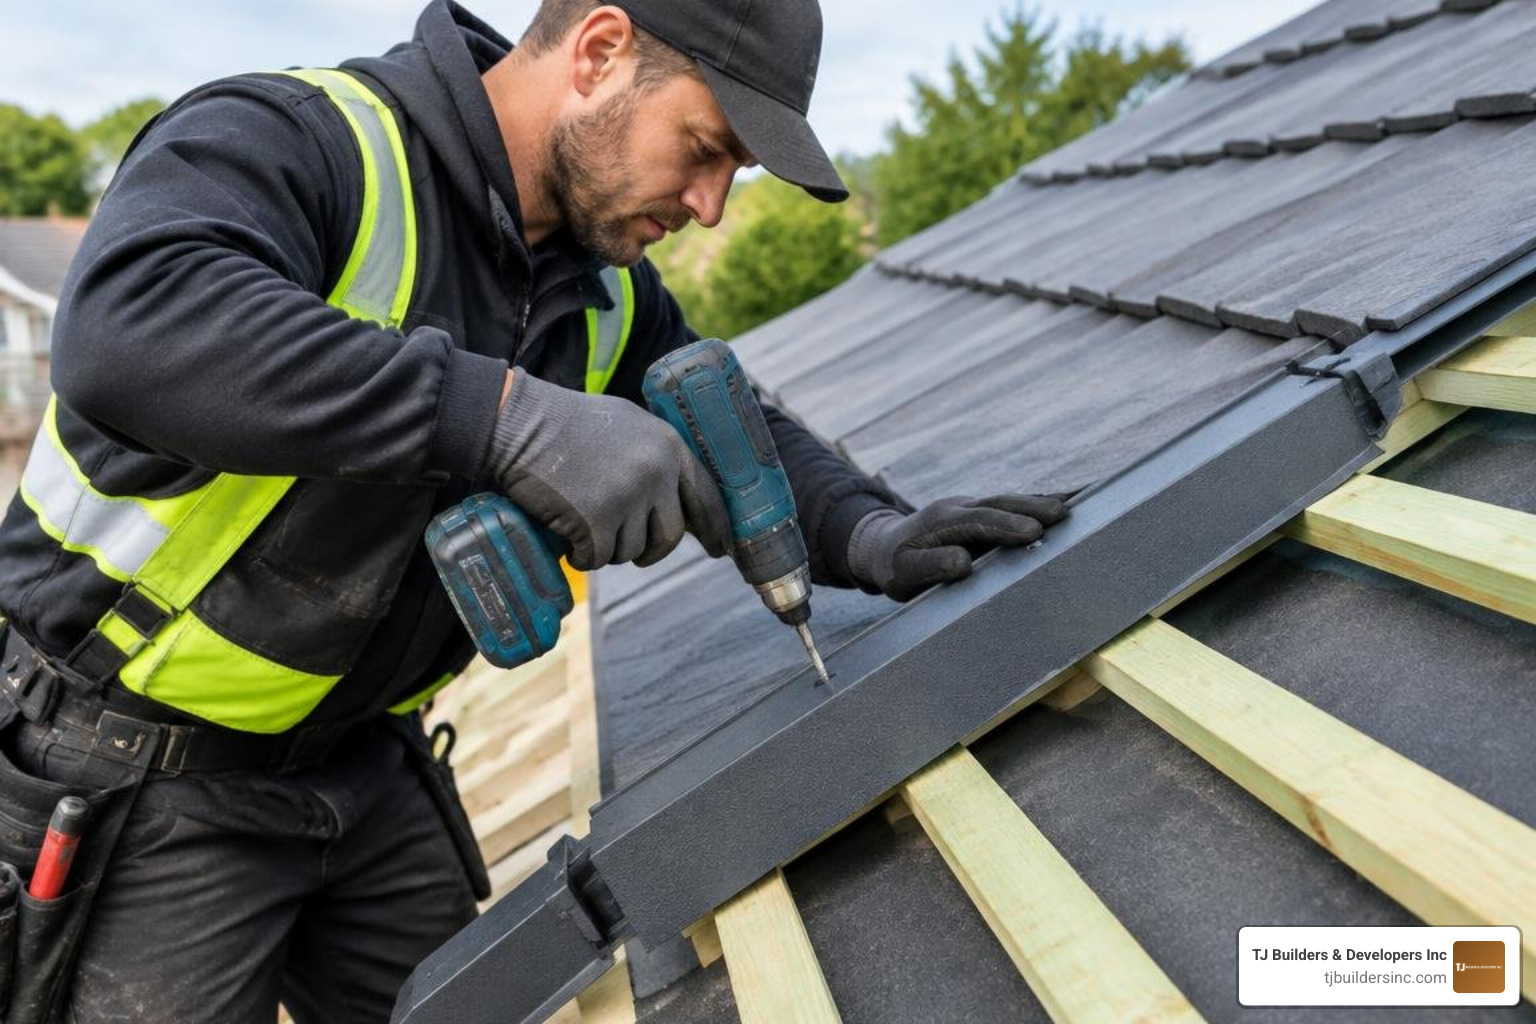
- Fasten the Unit: Drive a ring-shank nail or stainless screw through the designated fixing slot in the top heel of the verge unit into the batten end clip.
- Engage Successive Units: Take the next verge unit and slide its bottom channel over the heel fin of the lower unit. Push it forward until the interlocking clip clicks firmly into place.
- Check Alignment: Ensure the unit sits completely flush against the side of the roof tile without bowing. Fasten the upper heel into the next batten.
- Advance to the Ridge: Repeat this interlocking sequence along both the left and right verges toward the apex. Integrate your top verge detailing alongside modern ridge ventilation systems to maintain healthy attic airflow.
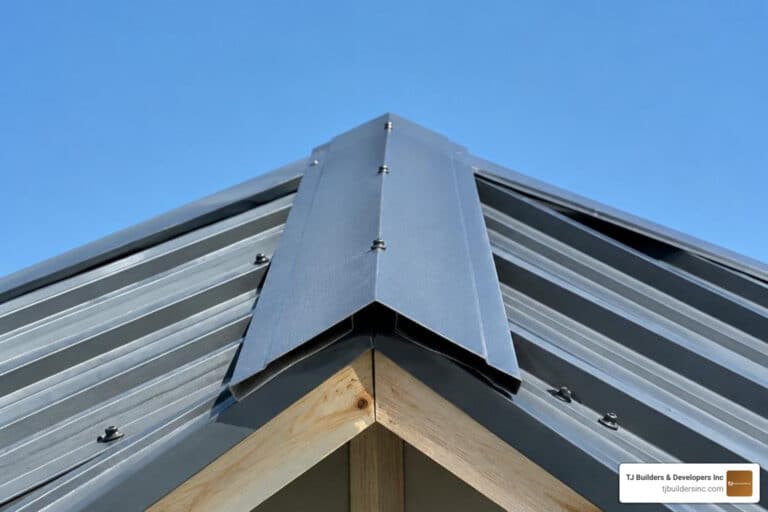
- Cap the Apex: At the peak of the gable, mitre-trim the top verge units if necessary, then install a dedicated half-round or universal ridge end cap over the units, securing it with weather-sealed screws.
Need Help With Your Home?
TJ Builders & Developers handles roofing, siding, gutters, windows, home additions, and fire damage restoration for homes and businesses in Lakewood, Crystal Lake, Schaumburg, and nearby McHenry County towns.
- Free, no-obligation estimates
- Licensed & insured
- 20+ years of local experience
Water Drainage, Wall Protection, and Retrofitting
A dry verge is not just a cosmetic border; it is a critical water-management device. Without properly designed and installed water channels, runoff cascading down the roof rake can spill down the gable masonry, leading to dark stains, efflorescence, and moisture penetration.
Preventing Gable Wall Staining and Runoff
High-quality dry verge components are engineered with internal drainage baffles and external deflector lips:
- Deflector Lips: The bottom profile of each modular unit features an outward-flared lip. This lip forces sheets of running rainwater to drip clear of the bargeboard and exterior cladding.
- Internal Drainage Channels: Any wind-driven water that slips between the tile edge and the plastic casing is caught in an internal trough and channeled downward from unit to unit, safely exiting into the gutter.
- Protection for Exterior Trim: By diverting moisture away from vertical surfaces, dry verges protect supporting woodwork, reducing maintenance on elements detailed in our guide to fascia board installation.
Retrofit Considerations and Ridge Cap Integration
Dry verge systems can be retrofitted onto existing properties to replace crumbling mortar verges:
- Mortar and Undercloak Removal: The old sand-and-cement mortar must be carefully chiseled away, and any damaged undercloak boards removed, taking care not to crack the existing perimeter tiles.
- Batten Assessment and Extension: Inspect exposed batten ends for rot or wood decay. If the existing battens were cut flush with the brickwork, they will not provide the required 30mm to 38mm overhang. In these cases, battens must be extended using timber splicing pieces, or a continuous counter-batten strip must be anchored securely to the bargeboard or masonry to receive the dry verge clips.
- Ridge Cap Mating: When finishing the retrofit at the apex, ensure the verge units mate cleanly with the ridge line, integrating with existing ridge components or a newly fitted metal ridge cap installation.
Frequently Asked Questions About Dry Verge Systems
Are dry verge systems mandatory on modern pitched roofs?
While older properties may retain legacy wet-mortar verges, modern roofing standards strongly emphasize mechanical fixing. Standards like BS 5534 state that all perimeter roof tiles must be mechanically anchored to resist wind uplift. Dry verge systems provide an efficient way to achieve complete mechanical compliance under BS 8612 without the long-term maintenance burdens of mortar.
Can dry verge units be fitted onto existing roofs without stripping tiles?
Yes. Retrofitting is common on older homes with deteriorated mortar. Roofers remove the loose mortar bedding, inspect the batten ends, and install retrofit batten brackets or timber extensions to securely mount the new dry verge units. The central field of roof tiles remains undisturbed throughout the process.
How do dry verge units stop rainwater from staining gable masonry?
Modern dry verge units incorporate drainage slots, internal water tracks, and a bottom deflector lip that extends outward from the building envelope. This forces surface water to drip freely into the guttering system rather than running down the vertical masonry or siding.
Conclusion
A well-installed dry verge system transforms your roof perimeter from a recurring maintenance headache into a durable, weather-tight defense against high winds and driving rain. By eliminating weak mortar joints and relying on engineered mechanical fixings, homeowners gain lasting peace of mind throughout every season.
At TJ Builders & Developers Inc, we deliver exterior construction and restoration across Northern Illinois communities, including Lakewood, Crystal Lake, and Schaumburg. Whether you need comprehensive roofing work, siding upgrades, window replacements, gutter systems, or home additions, our focus is always on high-caliber workmanship and durable materials. For an in-depth look at our exterior standards, explore our complete roof installation and replacement guide.