What Every Homeowner Should Know Before Starting a Roof Installation
Roof installation is one of the largest investments you’ll make in your home — and one of the easiest to get wrong.
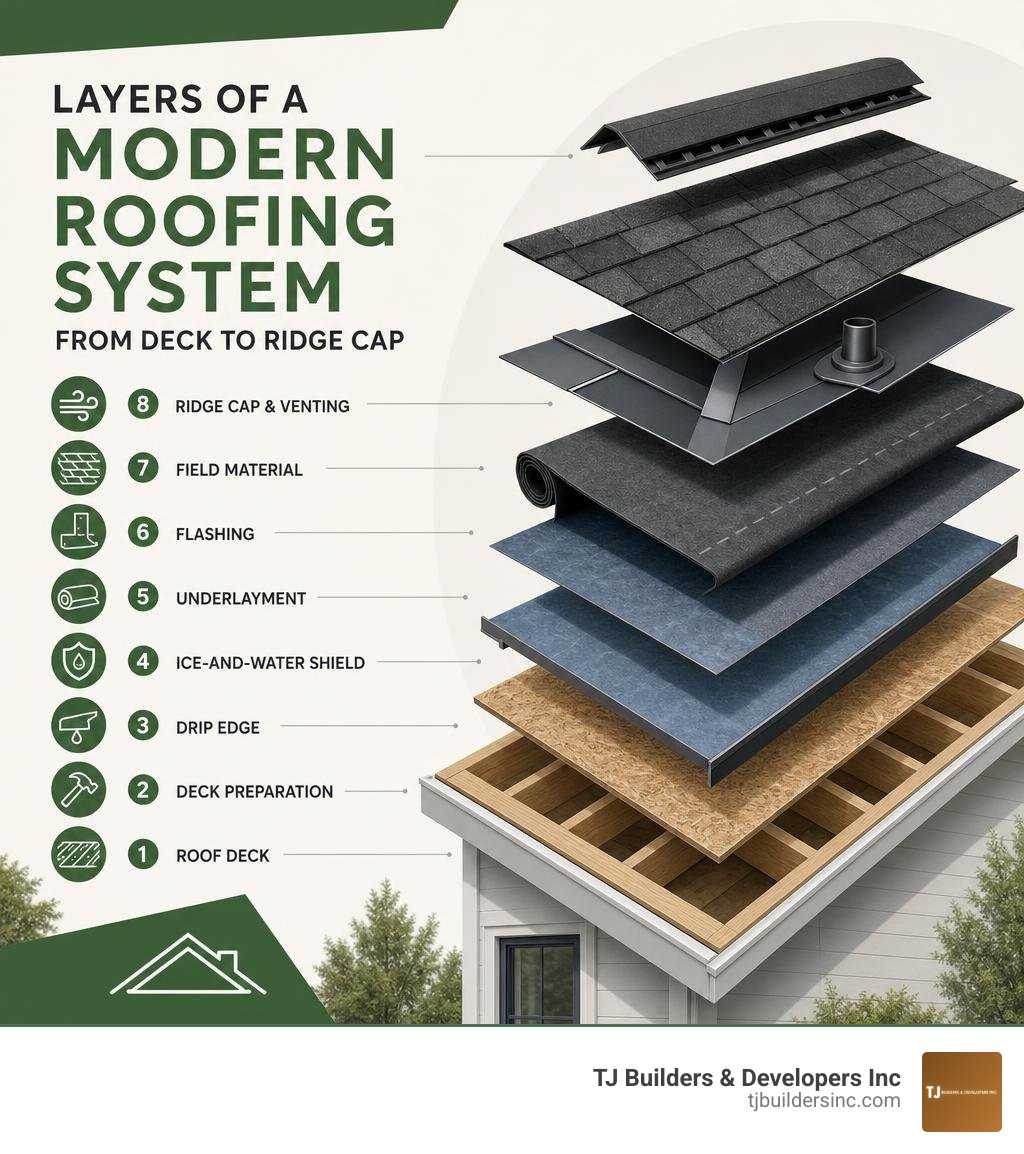
Here’s a quick overview of what the process typically involves:
- Tear-off – Remove old shingles and inspect the deck
- Deck preparation – Repair or replace damaged sheathing
- Drip edge – Install along eaves and rakes
- Ice-and-water shield – Apply at eaves, valleys, and penetrations
- Underlayment – Roll out synthetic felt over the full deck
- Flashing – Seal all transitions, walls, and penetrations
- Field material – Install your chosen shingles or panels
- Ridge cap and venting – Finish the peak and ensure airflow
- Cleanup and inspection – Magnetic nail sweep, final walkthrough
The national average cost runs $9,513, with most homes falling between $8,000 and $25,000 depending on size, materials, and labor market. Most asphalt shingle roofs are completed in 1 to 3 days.
The stakes are high. According to the NRCA, improper installation causes more than 70% of all roofing failures — more than weather damage and material defects combined. That number alone explains why choosing the right contractor matters as much as choosing the right materials.
A bad roof doesn’t just leak. It rots decking, breeds mold, and quietly destroys the structure beneath it — often before you notice anything wrong.
I’m Thomas Pruszynski from TJ Builders & Developers Inc, and after more than 20 years of hands-on experience in residential exterior construction — including hundreds of completed roof installations across Northern Illinois — I’ve seen what separates a roof that lasts from one that fails within a few seasons. This guide walks you through everything you need to know to make a confident, informed decision.
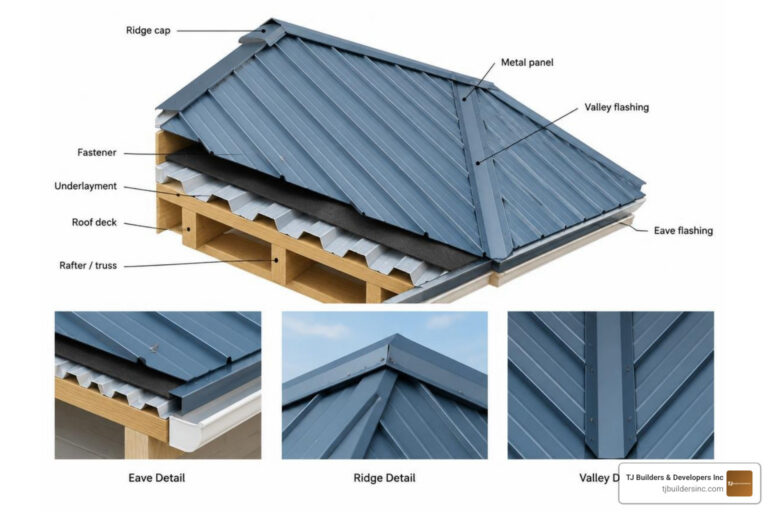
Basic roof installation vocab:
The Step-by-Step Professional Roof Installation Process
When we pull up to a home in Crystal Lake or Woodstock, we don’t just start nailing down shingles. A professional roof installation is a highly orchestrated, step-by-step sequence. If a contractor skips even one of these steps, you are looking at a ticking clock before the first leak appears.

Here is how a proper, code-compliant installation must unfold:
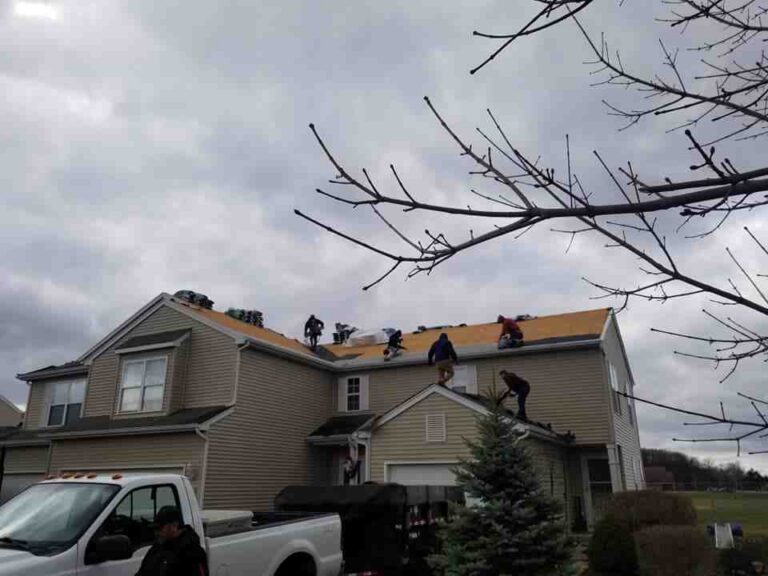
Step 1: Complete Tear-Off and Deck Preparation
Some homeowners ask if they can save a few bucks by nailing new shingles over old ones (an overlay). While building codes in some areas technically allow up to two layers, we strongly advise against it. An overlay traps heat, doubles the weight on your rafters, and prevents us from inspecting the wooden deck underneath.
During a full tear-off, we strip the roof down to the bare wood. We inspect the decking for soft spots, rot, and structural sagging. Any damaged 7/16-inch OSB or 5/8-inch plywood sheathing must be replaced immediately to ensure a solid nailing surface. To learn more about why a clean deck is vital, read our Roof Installation Replacement Complete Guide.
Step 2: Drip Edge Installation
The drip edge is a non-corrosive metal flashing shaped like an “L.” It is designed to direct water away from your fascia board and straight into your gutters. Per the Owens Corning Roofing Installation Guide, the drip edge must be installed directly onto the wood deck along the eaves before the underlayment goes down. Along the rake edges (the sloped sides of the roof), it goes over the underlayment.
Step 3: Ice-and-Water Shield (Leak Barrier)
In Northern Illinois, our winters bring heavy snow and freeze-thaw cycles that cause ice dams. An ice-and-water shield is a self-adhering, rubberized asphalt membrane. It is applied along the eaves, extending at least 24 inches inside the warm interior wall line. We also run this protective barrier down the center of all valleys and around critical roof penetrations like chimneys and skylights.
Step 4: Synthetic Underlayment
Next, we roll out a high-performance synthetic felt underlayment over the rest of the exposed deck. Traditional 15-pound felt paper is prone to tearing and wrinkling when wet. Modern synthetic underlayments are incredibly durable, water-resistant, and provide a much safer, slip-resistant walking surface for our crews during installation.
Step 5: Starter Strips and Field Material
Before the first course of shingles is laid, we install starter shingles along the eaves and rakes. Starter strips feature a pre-applied strip of adhesive designed to lock down the edges of the first shingle course, preventing wind uplift. Once the starter is secure, we install the primary field material (such as architectural shingles or metal panels) from the bottom up, staggering the joints to prevent water from finding a path through the seams.
Step 6: Ridge Vents, Caps, and Final Inspection
We finish the roof peak by cutting a continuous slot in the decking to install a ridge vent. This allows hot, humid air to escape your attic. We then cover the vent with specialized ridge cap shingles. Finally, we perform a thorough property cleanup — using heavy-duty magnetic sweeps to collect stray nails — and conduct a comprehensive visual and structural walkthrough.
Need Help With Your Home?
TJ Builders & Developers handles roofing, siding, gutters, windows, home additions, and fire damage restoration for homes and businesses in Lakewood, Crystal Lake, Schaumburg, and nearby McHenry County towns.
- Free, no-obligation estimates
- Licensed & insured
- 20+ years of local experience
Comparing Roofing Materials, Lifespans, and Costs
No two homes are identical, and the material you choose will dictate your roof’s performance, look, and long-term value. Below is a breakdown of how the most popular roofing materials compare in 2026:
| Material | Lifespan (Years) | Cost per Sq. Ft. (Installed) | Wind Resistance | Best Suited For |
|---|---|---|---|---|
| Architectural Shingles | 20 – 30 | $4.35 – $9.80 | Up to 110–130 mph | Standard residential homes seeking durability and classic appeal |
| Standing Seam Metal | 50 – 70 | $14.00 – $25.00 | Up to 140+ mph | Modern homes, low-slope sections, and maximum longevity |
| Cedar Shakes / Shingles | 30 – 40 | $12.00 – $20.00 | Excellent | Historic homes and rustic, high-end architectural styles |
| Clay / Concrete Tile | 50 – 100 | $15.00 – $35.00 | High | Heavy-duty structural frames and Mediterranean designs |
| Synthetic Composite | 40 – 50 | $10.00 – $18.00 | Excellent | Eco-conscious homeowners wanting the look of slate or cedar without the weight |
Choosing the Right Material for Your Roof Installation
For the vast majority of homeowners in the Chicago suburbs, the choice comes down to architectural asphalt shingles or metal roofing.
- Architectural Asphalt Shingles: Unlike flat, traditional three-tab shingles, architectural shingles feature multiple layers laminated together. This gives them a dimensional, wood-shake look, superior wind resistance, and a much longer lifespan. They are highly reliable and versatile. For a closer look at this process, check out our guide on Asphalt Roof Installation.
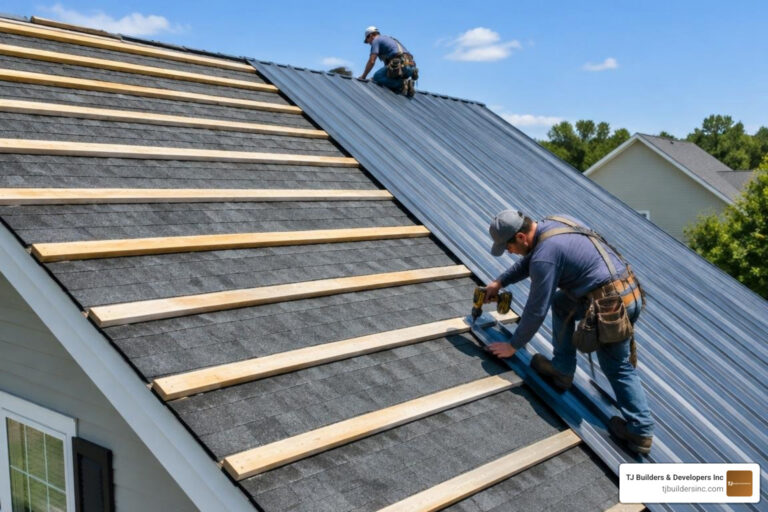
- Standing Seam Metal: If you plan on staying in your home for decades, standing seam metal is a premier choice. The fasteners are concealed within raised interlocking seams, meaning there are no exposed screws to back out or leak over time. It sheds snow effortlessly and reflects solar heat, lowering your summer cooling bills. Dive deep into this premium system with our Standing Seam Metal Roof Installation A Step By Step Masterclass.
- Stone-Coated Metal: If you love the look of classic clay tile or rustic wood shakes but want the lightweight strength of steel, systems like those detailed in the DECRA Installation Guide offer an exceptional alternative. They provide a Class A fire rating and outstanding impact resistance against Midwestern hail.
Key Factors Influencing Roof Installation Costs
When estimating a roof installation, simple square footage is only half the story. Several hidden variables can shift your final quote:
- Roof Pitch (Steepness): A steep roof (typically anything above an 8:12 pitch) requires specialized safety harnesses, scaffolding, and slower, more deliberate labor. This steep-slope premium can add 10% to 25% to labor costs.
- Complexity and Cuts: Hips, valleys, dormers, skylights, and chimneys require meticulous flashing and precise material cuts. A simple gable roof with two flat planes is much quicker and less labor-intensive to install than a complex multi-gabled roof.
- Labor Markets: Labor accounts for 50% to 60% of your total installation cost. While costs are generally stable across the Midwest, localized demand, safety requirements, and overhead in the broader Chicago metropolitan area can cause variations.
- Decking Replacement: If we tear off your old roof and find rotted sheathing, replacing those sheets of wood typically adds $75 to $150 per sheet (including labor and materials).
To avoid surprises, we always recommend establishing a modest contingency budget of 5% to 10% to cover unforeseen deck repairs. For a transparent breakdown of what to expect financially, read The Cost Of A New Crown What To Expect For Your Asphalt Shingle Roof Replacement.
Critical Weatherproofing: Underlayment, Flashing, and Ventilation
A roof is far more than just the shingles you see from the curb. It is an engineered system designed to shed water, seal out wind-driven rain, and breathe naturally to prevent moisture buildup in your attic.
The Unsung Hero: Flashing
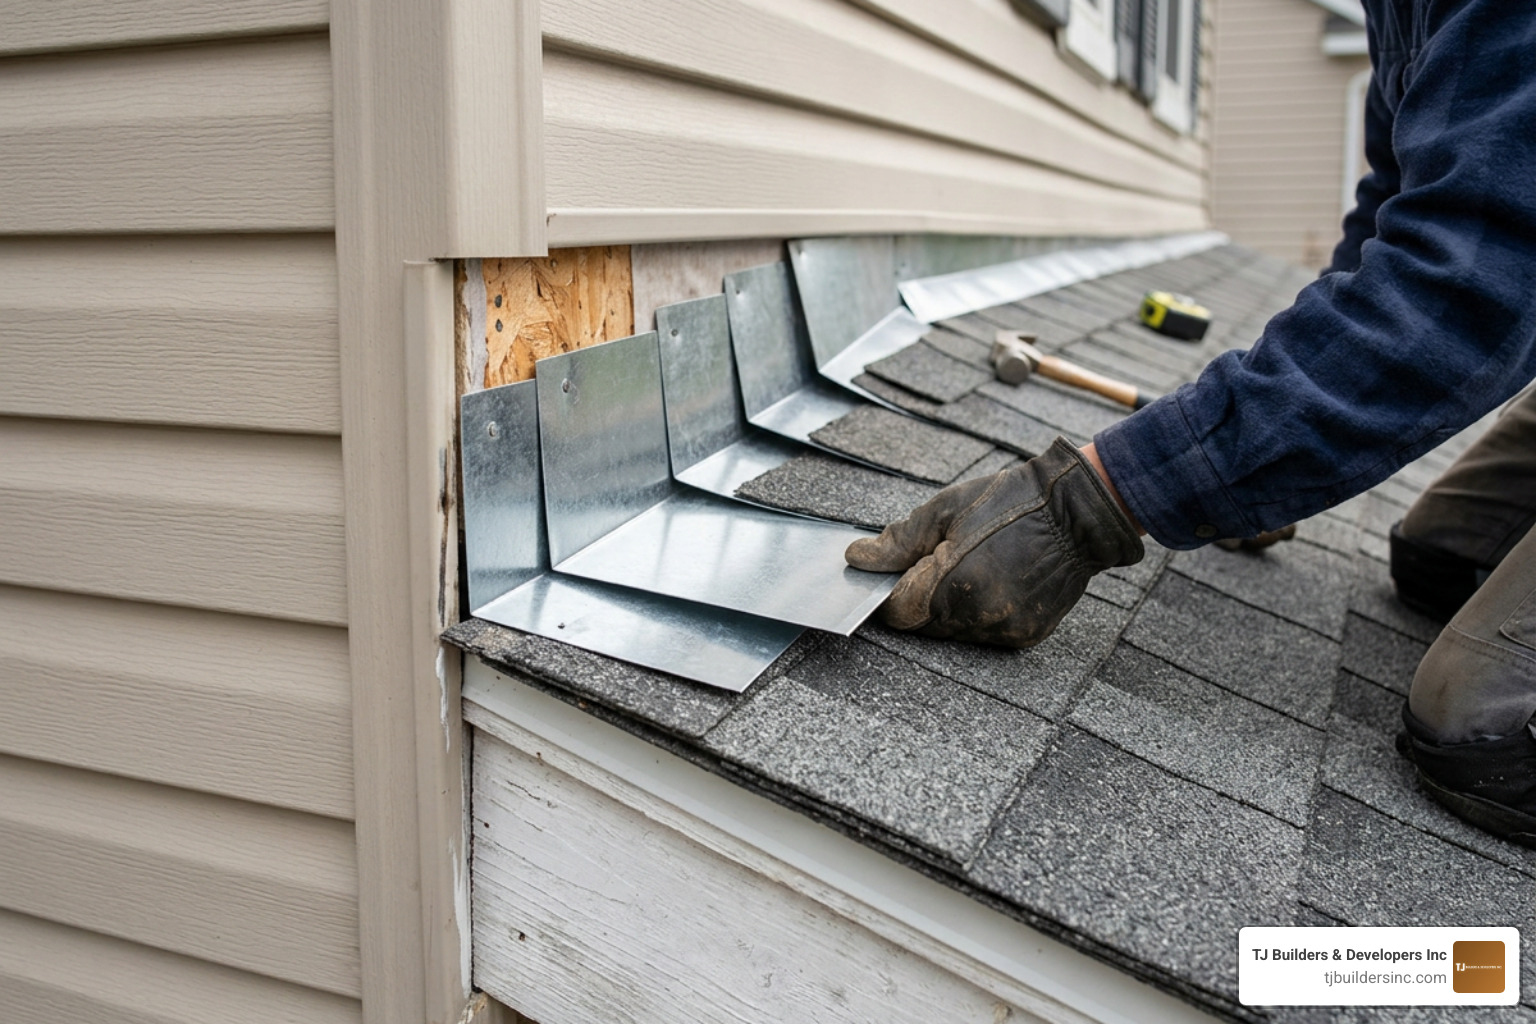
Flashing consists of thin metal pieces installed at crucial transition points to divert water away from walls, chimneys, and valleys.
- Step Flashing: Installed where a sloped roof meets a vertical wall (like a dormer). We weave individual L-shaped metal pieces between every single course of shingles. Water is forced to step down the roof rather than slipping behind the siding.
- Counterflashing: Used on brick chimneys. The top edge of the metal is embedded into the mortar joints of the brick, covering the base flashing below to create a completely watertight seal.
- Valley Flashing: Valleys handle the highest volume of rushing water on your roof. We recommend open metal valleys lined with 26-gauge galvanized steel. It is highly durable and far less prone to wearing out compared to closed-cut shingle valleys.
Balancing Attic Ventilation
A roof that cannot breathe will destroy itself from the inside out. Without proper ventilation, summer attic temperatures can soar above 150°F, baking your shingles and voiding their manufacturer warranty. In the winter, trapped moisture from showers, cooking, and laundry condenses on the underside of your cold roof deck, leading to wood rot and mold.
The gold standard is a balanced ventilation system:
- Intake Vents: Located at the lowest part of the roof (soffit vents), drawing cool, fresh air into the attic.
- Exhaust Vents: Located at the highest peak (continuous ridge vents), allowing hot, moist air to escape naturally.
Per building codes (IRC R806), you need 1 square foot of net free ventilation area for every 150 square feet of attic floor space. If you are planning a complex project involving specialized architectural elements, check out The Ultimate Guide To Metal Roof And Skylight Installation In Lakewood for advanced weatherproofing strategies.
Need Help With Your Home?
TJ Builders & Developers handles roofing, siding, gutters, windows, home additions, and fire damage restoration for homes and businesses in Lakewood, Crystal Lake, Schaumburg, and nearby McHenry County towns.
- Free, no-obligation estimates
- Licensed & insured
- 20+ years of local experience
How to Choose a Qualified Roofing Contractor
With so many “storm chasers” and fly-by-night operations popping up after a heavy storm, finding a trustworthy local contractor can feel overwhelming.
When vetting local companies, always verify these essential credentials:
- State Licensing and Insurance: In Illinois, professional roofing contractors must hold a valid state roofing license. They should also carry a minimum of $1 million in general liability insurance and active workers’ compensation to protect you from liability in the event of an on-site accident.
- Manufacturer Certifications: Top manufacturers like GAF and CertainTeed only award their highest certifications (such as GAF Master Elite or CertainTeed Select ShingleMaster) to contractors with proven track records of safety, training, and financial stability. Hiring a certified contractor allows you to access exclusive extended warranties.
- Deep Local Roots: Look for a contractor with a physical office and a solid reputation in your area. For example, check out established regional networks like GAF Certified Contractors in Crystal Lake.
Red Flags to Watch Out For:
- The “Too Good to Be True” Low Bid: If a bid is significantly lower than others, they are likely cutting corners on underlayment, reusing rusty old flashing, or using uninsured subcontractors.
- Pressuring to Skip Permits: A contractor who tells you a building permit isn’t necessary is trying to avoid municipal inspections. This is a massive red flag.
- Reusing Old Components: Always ensure your estimate explicitly states that they will install brand-new drip edges, pipe boots, and valley flashing rather than reusing the old, worn-out pieces.
To help you make the right choice, we’ve put together comprehensive hiring guides. Take a look at How To Pick The Best Local Roofing Companies For Your Home and learn how to protect yourself with our guide on how to Dont Get Roof Ried Hire The Best Roofing Contractors In Schaumburg.
We also believe in supporting local communities across our service areas. Whether you need roofing, siding, windows, or gutters in Huntley, McHenry, Lake in the Hills, Algonquin, Cary, or Woodstock, always prioritize local accountability and verified credentials. Checking local municipal requirements and ensuring your contractor is fully licensed in your specific town remains your best defense against substandard work.
Frequently Asked Questions About Roof Replacement
How long does a standard roof replacement take?
For an average-sized residential home (around 2,000 to 2,500 square feet) using asphalt shingles, the actual installation takes 1 to 2 days. If your roof is exceptionally steep, has a complex layout, or if you choose standing seam metal or tile, it can take 3 to 5 days. Weather is the ultimate deciding factor; we will never strip your roof if there is rain in the forecast.
Do I need a building permit for a new roof?
Yes. Most municipal building departments in Northern Illinois require a permit for a complete roof replacement. Pulling a permit ensures that your local building inspector will review the work at key stages to guarantee it meets the International Residential Code (IRC Chapter 9). A professional contractor will handle the entire permit-pulling process for you.
Why is professional installation superior to DIY?
While DIY home improvement is great for painting or tiling, roofing is a high-risk project. Aside from the obvious fall hazards, roofing requires specialized tools and strict adherence to nailing patterns.
If a shingle is nailed even an inch too high, it misses the double-coverage strip, making it easy for high winds to rip it away. Furthermore, most major manufacturers will completely void their product warranties if they discover the materials were not installed by a licensed professional.
Conclusion
A new roof is your home’s primary shield against the unpredictable Midwestern weather. From heavy winter snows to severe summer thunderstorms, your roof bears the brunt of it all. Investing in a professional roof installation ensures that your home, your family, and your belongings remain safe, dry, and secure for decades to come.
At TJ Builders & Developers Inc, we take pride in delivering top-tier residential exterior services to our neighbors in Lakewood, Crystal Lake, Schaumburg, and the surrounding Northern Illinois communities. We combine premium materials, certified workmanship, and transparent communication to give you complete peace of mind.
Ready to protect your home with a roof built to last? TJ Builders & Developers Inc Roofing Services is here to help. Contact us today to schedule your comprehensive, professional roof consultation.