What You Need to Know About Attic Ventilation Installation
Attic ventilation installation is the process of adding intake and exhaust vents to create continuous airflow through your attic — preventing heat and moisture from building up and damaging your roof from the inside out.
Quick answer: How to install attic ventilation correctly
- Calculate your net free area (NFA): Divide your attic floor square footage by 150 (or 300 with a vapor barrier) to get the minimum NFA in square feet.
- Split intake and exhaust 50/50: Half your NFA comes from soffit vents (intake), half from ridge or box vents (exhaust).
- Choose the right vent type: Ridge vents with continuous soffit vents are the most effective passive system for most homes.
- Install rafter baffles: Keep insulation from blocking soffit vents to maintain clear airflow.
- Seal air leaks first: Close gaps between living space and attic before installing vents.
Most homes are more under-ventilated than their owners realize. In fact, 70% of homes inspected during re-roofing have less than half the recommended ventilation for their attic size. On a hot summer day, a poorly ventilated attic can reach 140–160°F — quietly cooking your shingles and driving up your cooling bills year after year.
This guide walks you through the full process, from calculating what your attic actually needs to understanding how each vent type works and when to call in a professional.
I’m Thomas Pruszynski from TJ Builders & Developers Inc., and over more than 20 years of exterior construction work across Northern Illinois, attic ventilation installation has been one of the most consistently misunderstood and under-addressed parts of a healthy roofing system. In the sections below, I’ll share what we’ve learned from hundreds of roofing projects so you can make confident, informed decisions about your home.
Attic ventilation installation glossary:
Why Proper Attic Airflow Matters
It is easy to ignore the attic. Since it is a space we rarely visit, we tend to adopt an “out of sight, out of mind” attitude. However, the air moving through your attic plays a critical role in the health, structural integrity, and comfort of your entire home.
When an attic lacks proper airflow, it becomes a trap for two major destructive forces: extreme heat in the summer and excessive moisture in the winter. Without a clear pathway to escape, these elements will degrade your building materials and force your heating and cooling systems to work twice as hard. Understanding how proper airflow protects your property is the first step toward securing a durable, energy-efficient home. You can explore these core advantages in detail in our guide on The Complete Guide to Roof Ventilation Benefits.
Preventing Moisture and Heat Damage
In our Northern Illinois climate—stretching from the cold winters of Woodstock and McHenry to the humid summers of Schaumburg—moisture control is a year-round battle. Daily household activities like cooking, showering, and doing laundry release gallons of water vapor into the air. Because warm air rises, this moisture migrates upward into the attic.
If the attic is cold and poorly ventilated, this water vapor hits the cold underside of your roof deck and condenses into liquid water. Over time, this chronic dampness leads to wood rot, warped decking, rusted roofing nails, and ruined insulation. Worse, it creates the perfect breeding ground for mold and mildew, which can eventually compromise your indoor air quality. To see a real-world example of how severe this can get, look at this Attic Mold Case Study, which highlights the costly remediation required when trapped moisture is left unaddressed.
Winter also brings the threat of ice dams. When warm air is trapped in an unventilated attic, it heats up the roof deck, melting the snow on top. As that melted water runs down to the colder eaves, it refreezes, creating a thick ice barrier. This ice dam forces subsequent meltwater under your shingles, causing severe leaks inside your walls and ceilings.
Extending Roof Lifespan and Lowering Energy Bills
During July and August, the sun beats down relentlessly on your roof. In an unventilated attic, temperatures can easily soar to 150°F or higher. This extreme thermal buildup acts like an oven, baking your roof shingles from both sides. Heat-damaged shingles can fail 5 to 10 years earlier than their rated lifespan, curling, cracking, and losing their protective granules prematurely. With roof replacement costs typically ranging from $8,000 to $20,000, losing a decade of shingle life is an incredibly expensive consequence of poor ventilation.
Furthermore, a superheated attic acts like a massive radiator sitting directly above your ceiling. This heat transfers down into your living spaces, forcing your air conditioner to run constantly. Correcting your attic’s ventilation can lower your cooling costs by 10% to 30%, keeping your home more comfortable while putting money back in your pocket.
Need Help With Your Home?
TJ Builders & Developers handles roofing, siding, gutters, windows, home additions, and fire damage restoration for homes and businesses in Lakewood, Crystal Lake, Schaumburg, and nearby McHenry County towns.
- Free, no-obligation estimates
- Licensed & insured
- 20+ years of local experience
Calculating Your Attic Ventilation Needs
You cannot simply guess how many vents your roof requires. Achieving the perfect balance of airflow requires careful mathematical calculation based on the International Residential Code (IRC) Section R806.
The baseline standard for attic ventilation is the 1:150 rule. This rule dictates that you must provide 1 square foot of Net Free Area (NFA) for every 150 square feet of attic floor space. Net Free Area refers to the actual open area of a vent that allows air to pass through, accounting for the space blocked by grates, screens, or louvers.
However, the building code allows for a reduction to the 1:300 rule (1 square foot of NFA per 300 square feet of attic floor space) if two specific conditions are met:
- A Class I or II vapor retarder is installed on the warm-in-winter side of the attic ceiling.
- The ventilation system is balanced, meaning that between 40% and 50% of the required ventilation area is located in the upper portion of the roof (within 3 feet of the ridge) and the remaining balance is located in the lower third (at the eave or soffit).
| Attic Floor Area (Sq. Ft.) | 1:150 Rule Total NFA Required (Sq. Ft. / Sq. In.) | 1:300 Balanced Rule Total NFA Required (Sq. Ft. / Sq. In.) |
|---|---|---|
| 1,000 | 6.67 sq. ft. / 960 sq. in. | 3.33 sq. ft. / 480 sq. in. |
| 1,500 | 10.00 sq. ft. / 1,440 sq. in. | 5.00 sq. ft. / 720 sq. in. |
| 2,000 | 13.33 sq. ft. / 1,920 sq. in. | 6.67 sq. ft. / 960 sq. in. |
| 2,500 | 16.67 sq. ft. / 2,400 sq. in. | 8.33 sq. ft. / 1,200 sq. in. |
The 50/50 Balance: Intake vs. Exhaust
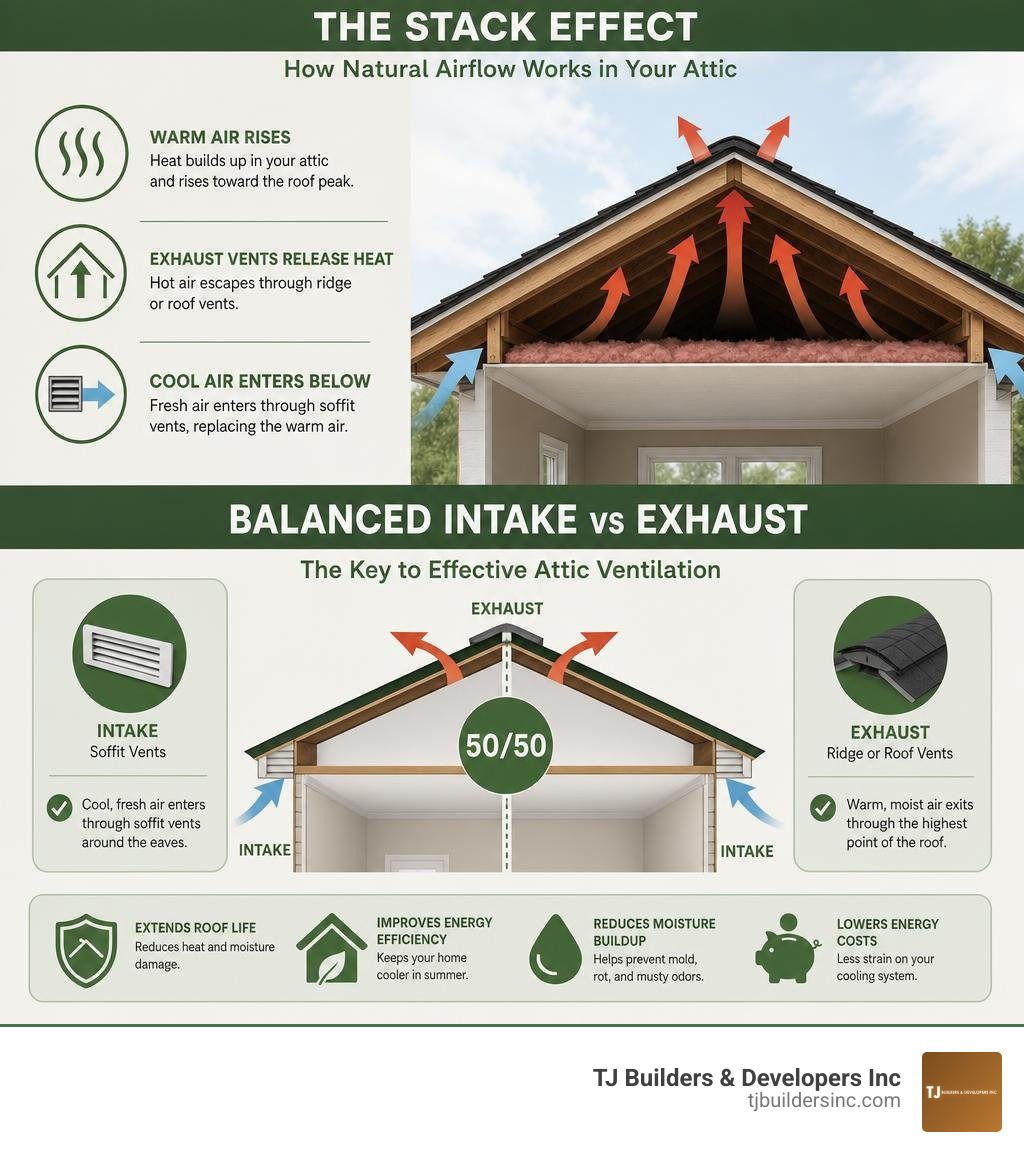
For an attic ventilation system to function efficiently, it must be balanced. This means that exactly 50% of the required NFA should be intake ventilation (located low at the soffits or eaves) and 50% should be exhaust ventilation (located high near the ridge).
This balanced design leverages two natural forces:
- The Stack Effect: Warm air naturally rises. As hot, humid air escapes through the high exhaust vents, it creates a low-pressure area that draws cooler, drier air into the attic through the low intake vents.
- The Wind Effect: When wind blows against your home, it creates high pressure at the windward eaves and low pressure over the ridge of the roof, naturally pulling air through the system.
If you install exhaust vents without corresponding intake vents, the system will fail. The exhaust vents will try to pull air from somewhere, and they will end up sucking conditioned air out of your living space through tiny gaps in your ceiling, wasting energy and money.
Adjusting for Roof Pitch and Vapor Barriers
Standard NFA calculations assume a typical roof pitch. However, steeper roofs contain a larger volume of air within the attic space and require additional ventilation capacity to move that extra air.
- For roof pitches between 7:12 and 10:12, you should add 20% to your total calculated NFA.
- For steep pitches of 11:12 or greater, you should increase your calculated NFA by 30%.
Additionally, the presence or absence of a ceiling vapor retarder will dictate whether you must design around the conservative 1:150 ratio or if you can safely utilize the 1:300 ratio. When we assess homes in Crystal Lake or Lake in the Hills, we carefully inspect the ceiling construction and roof pitch to ensure your calculations are perfectly tailored to your home’s unique architecture.
Choosing the Right Vents for Your Attic Ventilation Installation
Not all roof vents are created equal. The right choice depends on your roof shape, aesthetic preferences, and whether you are retrofitting an existing roof or installing a brand-new system. Vents are broadly categorized into passive systems (which rely on natural air movement) and active systems (which use mechanical assistance). For a comprehensive breakdown of your options, check out Venting Out: A Guide to the Best Roof Ventilation Systems Available.
Ridge Vents and Soffit Vents
For the vast majority of residential homes, a passive combination of continuous ridge vents and continuous soffit vents is the gold standard.
- Soffit Vents: Installed under the eaves of your roof, these act as the intake. They can be individual screened vents or continuous perforated vinyl or aluminum panels.
- Ridge Vents: These run continuously along the entire peak of your roof. A narrow slot is cut into the roof deck on either side of the ridge, and the vent is installed over it, then capped with matching shingles so it blends seamlessly into the roofline.
This system provides continuous, uniform airflow across every single rafter bay, leaving no “dead zones” where heat or moisture can pool. To understand why this setup is so highly recommended by building scientists, read The Ultimate Guide to Keeping Your Roof Dry with Ridge Ventilation.
Box Vents, Gable Vents, and Turbines
When a continuous ridge vent isn’t structurally feasible—such as on roofs with complex hips, multiple valleys, or very short ridges—alternative passive vents are used:
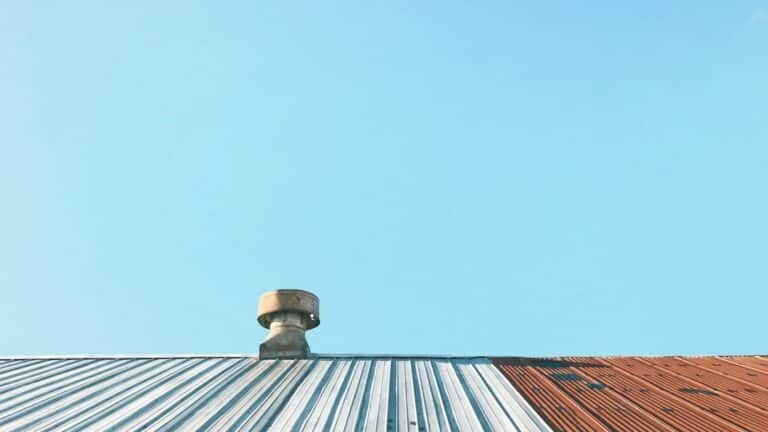
- Box Vents (Static Vents): These are small, square hoods installed near the top of the roof. They have no moving parts and rely entirely on the stack effect. While effective, you need multiple box vents spaced out across the roof to match the capacity of a single continuous ridge vent.
- Gable-End Vents: These are screened vents installed in the vertical walls at the gable ends of an attic. They rely heavily on cross-winds to move air horizontally across the attic.
- Turbine Vents (Whirlybirds): These utilize spinning, wind-driven domes to actively draw air out of the attic. They are highly efficient when the wind is blowing at least 5 mph, but they are highly visible and can occasionally squeak if not properly maintained.
Powered and Solar Attic Fans
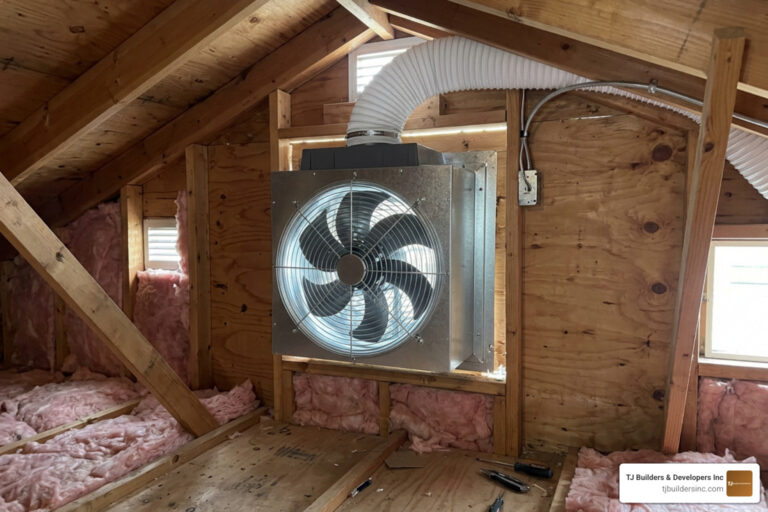
Active ventilation systems use motorized fans to force air out of the attic. These are usually mounted on the roof or on a gable wall and are controlled by a thermostat or humidistat.
- Powered Attic Ventilators (PAVs): These electric fans kick on when the attic reaches a set temperature (often 90–100°F). While they exhaust heat quickly, they consume electricity and can actually pull air-conditioned air out of your home if your attic floor isn’t perfectly air-sealed.
- Solar Attic Fans: These use an integrated solar panel to power the fan, meaning they cost nothing to operate. They automatically run during peak daylight hours when heat buildup is at its worst. If you are considering adding a fan to your setup, our guide Don’t Sweat It: A Guide to Attic Roof Vent Fans offers great insights into making the right selection.
Need Help With Your Home?
TJ Builders & Developers handles roofing, siding, gutters, windows, home additions, and fire damage restoration for homes and businesses in Lakewood, Crystal Lake, Schaumburg, and nearby McHenry County towns.
- Free, no-obligation estimates
- Licensed & insured
- 20+ years of local experience
Professional Standards for Roof Vent Setup

When we perform an attic ventilation installation, we adhere to strict building science principles to ensure the system is durable, weather-tight, and highly efficient. Simply cutting a hole and nailing down a vent is not enough. A proper installation requires coordinating the air barrier, the insulation level, and the vents themselves to work as a unified system. Homeowners can review these target metrics in detail using the Comprehensive Attic Package Guide.
Professional Standards for Ridge and Box Attic Ventilation Installation
Properly installing exhaust vents on an existing asphalt shingle roof requires surgical precision. For a ridge vent, we carefully snap chalk lines along the peak and use a circular saw set to the exact depth of the roof decking to avoid cutting into the structural rafters or ridge board. We stop the cut at least 12 inches away from any exterior walls or chimneys to maintain structural integrity and prevent wind-driven rain from entering the home.
For box vents, we locate the space between rafters from inside the attic, drive a locator nail through the deck, and then cut the hole from the roof surface. When installing the vent, we carefully release the surrounding shingles, apply a generous bed of high-grade roofing sealant to the underside of the vent flange, and slide the top half of the flange under the shingles above the hole. This ensures that water running down the roof flows naturally over the vent flange rather than beneath it. We only nail the top and sides of the flange—never nail the bottom edge, as exposed nails on the lower flange are the number-one cause of roof leaks.
Keeping Intake Vents Clear with Rafter Baffles
You can have the most advanced exhaust vents in the world, but if your intake is blocked, your attic will not breathe. The most common mistake we see in Northern Illinois attics is insulation that has blown over and completely choked off the soffit vents.
To prevent this, we install rigid rafter baffles (also called wind baffles or insulation chutes) in every single rafter bay. These pre-formed foam or plastic channels are stapled directly to the roof decking where the attic ceiling meets the floor. They create a guaranteed, continuous 1-inch clear air path from the soffit vent, extending at least 6 inches above the final height of your insulation. This keeps loose-fill fiberglass or cellulose exactly where it belongs while allowing fresh air to flow freely.
The Importance of Air Sealing Before Attic Ventilation Installation
Before we add new insulation or optimize your attic ventilation, we must create an airtight boundary between your living spaces and the unconditioned attic. This process, known as air sealing, prevents warm, humid household air from escaping into the attic.
Using expanding foam, fire-rated caulking, and weatherstripping, we seal every hidden bypass. This includes gaps around plumbing stacks, electrical wire penetrations, recessed “can” lights, chimneys, and the attic access hatch itself. Air sealing must always occur before ventilation and insulation. If you skip this step, your new ventilation system will pull conditioned air straight out of your home, raising your utility bills and introducing excess moisture into your roof structure. For a step-by-step technical breakdown of this process, refer to the Measure Guideline: Guide to Attic Air Sealing.
Frequently Asked Questions about Attic Ventilation
Can you combine different types of exhaust vents?
No, you should never mix different types of exhaust vents on the same roof.
A common mistake is leaving old box vents or gable vents active after installing a new ridge vent. This creates a “short circuit” in your ventilation system. Because the ridge vent is higher than the box or gable vents, it will pull air from those nearby openings instead of drawing it up from the soffit vents at the bottom of the roof. As a result, the lower portion of your attic remains stagnant, hot, and damp, defeating the purpose of your investment.
How do I know if my current attic ventilation is failing?
There are several warning signs you can look for without even climbing onto your roof:
- The Touch Test: On a hot summer day, touch your ceiling. If it feels warm to the touch, your attic is acting as a radiator and is under-ventilated.
- Rusty Nails: Go into your attic with a flashlight in the winter. If you see rusted roofing nails or frost forming on the underside of the roof deck, moisture is trapped.
- Ice Dams: If you notice thick ridges of ice building up along your gutters and eaves every winter, your attic is retaining too much heat.
- Shingle Buckling: Look at your roof from the ground. If the shingles look distorted, curled, or are losing their granules rapidly, they are being cooked from underneath.
Should I hire a professional for attic ventilation installation?
While some minor attic improvements can be handled by handy homeowners, cutting into your roof deck, wiring active fans, and working on steep roof pitches are tasks best left to professionals.
Working on a roof carries inherent safety risks, and improper cuts or poorly flashed vents can cause devastating water leaks that ruin your ceilings and walls. Furthermore, many shingle manufacturers will void your warranty if they find the roof was not ventilated to their exact specifications. Hiring certified professionals ensures that your roof remains structurally sound, water-tight, and fully warrantied. For guidance on selecting the right team in our area, read our guide on Lakewood Roof Ventilation Pros.
Conclusion
A healthy home starts with a roof that can breathe. Proper attic ventilation installation is not just a building code requirement; it is a vital investment in your home’s structural durability, energy efficiency, and indoor comfort. By balancing your intake and exhaust vents, keeping your soffits clear with baffles, and air sealing your ceiling plane, you protect your roof from premature failure and keep your energy bills under control.
At TJ Builders & Developers Inc., we take pride in delivering professional workmanship, long-term durability, and safety to our neighbors throughout the Village of Lakewood, Crystal Lake, Schaumburg, and the surrounding Northern Illinois suburbs. We understand our local climate and know exactly how to design a ventilation system that stands up to our freezing winters and humid summers.
If you want to ensure your roof is fully protected and performing at its best, reach out to us today. Explore our TJ Builders & Developers Roofing Services to schedule a comprehensive ventilation assessment for your home.